Monday, 21 February 2011

When Ikea doesn't make a small enough cabinet


Materials: cover panel, plywoods or cabinet material, IKEA hinges, drawer track and handles

Description: The problem with this space was it was too small for a regular sized IKEA lower cabinet. She really wanted the space for baking sheets and bag storage. We had to custom build two side cabinets with door fronts made from the cover panels that are the same brown stain as the rest of her IKEA kitchen. We ended up using one side hinge drawer from another IKEA cabinet as a track that sat underneath the pullout instead of on the side like IKEA cabinets.


The cover panel was cut down to size and stained on the side that was cut. The cover panel/door was routed to fit the IKEA hinges.


We had the same IKEA handles added to the drawer. Now we have to 7" width drawers that look exactly like IKEA cabinets on the outside.


See more of the slim kitchen cabinet.

~ John Webb Construction and Design, Portland and Eugene, Oregon

Candleholder vs. towelholder


Materials: LILLHOLMEN

Description: Although we don't have too long story about our idea, it is very easy, put onto the bathroom's (or any other place's) wall that LILLHOLMEN towelholder. I mean place it upside down and you get a kind, old school candle holder.

~ moszijo, budapest, hungary

Build a Rietveld-inspired chair with NUMERAR countertop


Materials: NUMERAR + plywood + paint (red, blue, black, yellow)

Description: Rietveld designed this red-blue chair in 1923, inspired by Mondrian.


1. I had some spare NUMERAR countertop (28mm thick)
2. The chair is made from 28mmx28mm sticks that you prepare, following instructions downloadable here.
3. Paint them in black (see picture above)
4. Buy 2 plywood rectangles, paint large one in red, small one in blue
5. Assemble and finish painting

~ laurent thenie, FR

Sunday, 20 February 2011

Gallant Standing Desk


Materials: 1 Gallant Desk 120cm x 60 cm, 1 Gallant Table Top (No Frame) 120cm x 60cm, 4 Ekby Tore Brackets, 4 5/8" Flathead Wood Screws. Carpenter's Square and Level (Optional)

Description: This is as simple as it gets.

Ekby Tore Height: 8 5/8"


1. Figure out what your preferred standing tabletop height height is, the Ekby Tore bracket and second Gallant tabletop add 8 5/8" so adjust the table legs accordingly.

2. Assemble the Gallant Desk as normal.

3. Position the Ekby Tore brackets around 8" from the edges of the tabletop, square them up using the carpenter's square and tighten with the supplied allen key.


4. Place the second tabletop on the Ekby Tore brackets, true up to the bottom tabletop using the level, once you are happy with the alignment, secure the second table top to the brackets with the wood screws.

~ Igor Schneider, Montreal, Canada

SMILA SOL Ceiling Fan


Materials: SMILA SOL

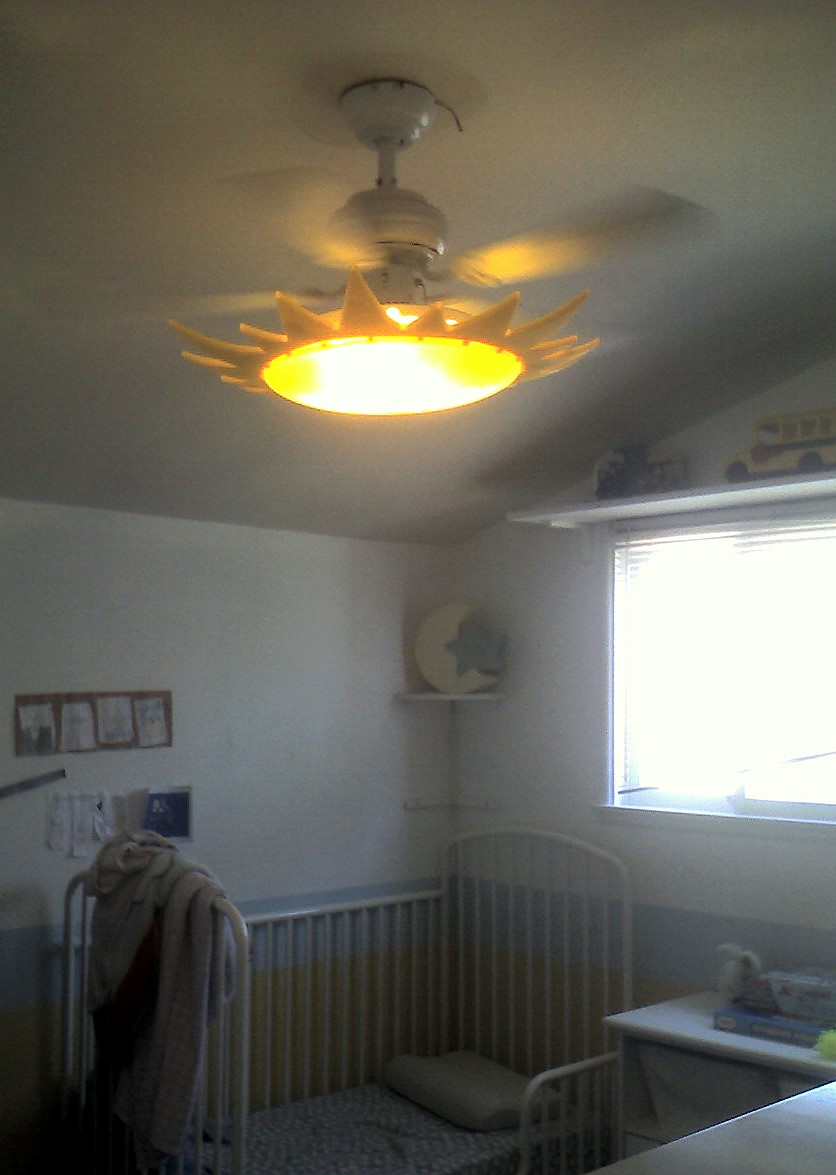
Description: The Kids Bedroom of our house (built in 1954) originally had a ceiling fixture. At some point a previous owner replaced it with a ceiling fan, which didn't match the decor.

I replaced it with plain white one from Home Depot, but was a little leery of the glass dome on the light kit and 2 rambunctious kids.

The SMILA SOL fit the bill as being made from plastic, and the sun/moon/stars theme made it a shoo-in. Unfortunately the SMILA SOL is meant to be mounted to a ceiling junction box and not a ceiling fan.

I removed the existing light kit and with the use of screws from my tool kit, I was able to securely attach our IKEA fixture to the fan!

See more of the Smila Sol ceiling fan.

~ PENFOLD, Whittier, CA

Saturday, 19 February 2011

Spice it Up! Klippan Sofa


Materials: RIT dye, salt, washing machine, Klippan sofa slipcover

Description:
When I moved into my Lower Greenville apartment in Dallas, I had a limited budget to outfit an entire apartment. So, of course, I went to every budget-lover's dream store, IKEA! They didn't have the couches I originally picked out in stock (thank goodness, because they would have been horrible once I got a dog and boyfriend!), so I chose to invest in the Klippan Sofa. It retails for $229, and has a great shape and size for what I was looking for.

Yet I thought it lacked a little pizazz when it came to slipcovers. You can choose from black, white, natural, primary blue, creepy-quilted, crazy pixel birds, or denim. None of which matched the urban-chic I was going for.

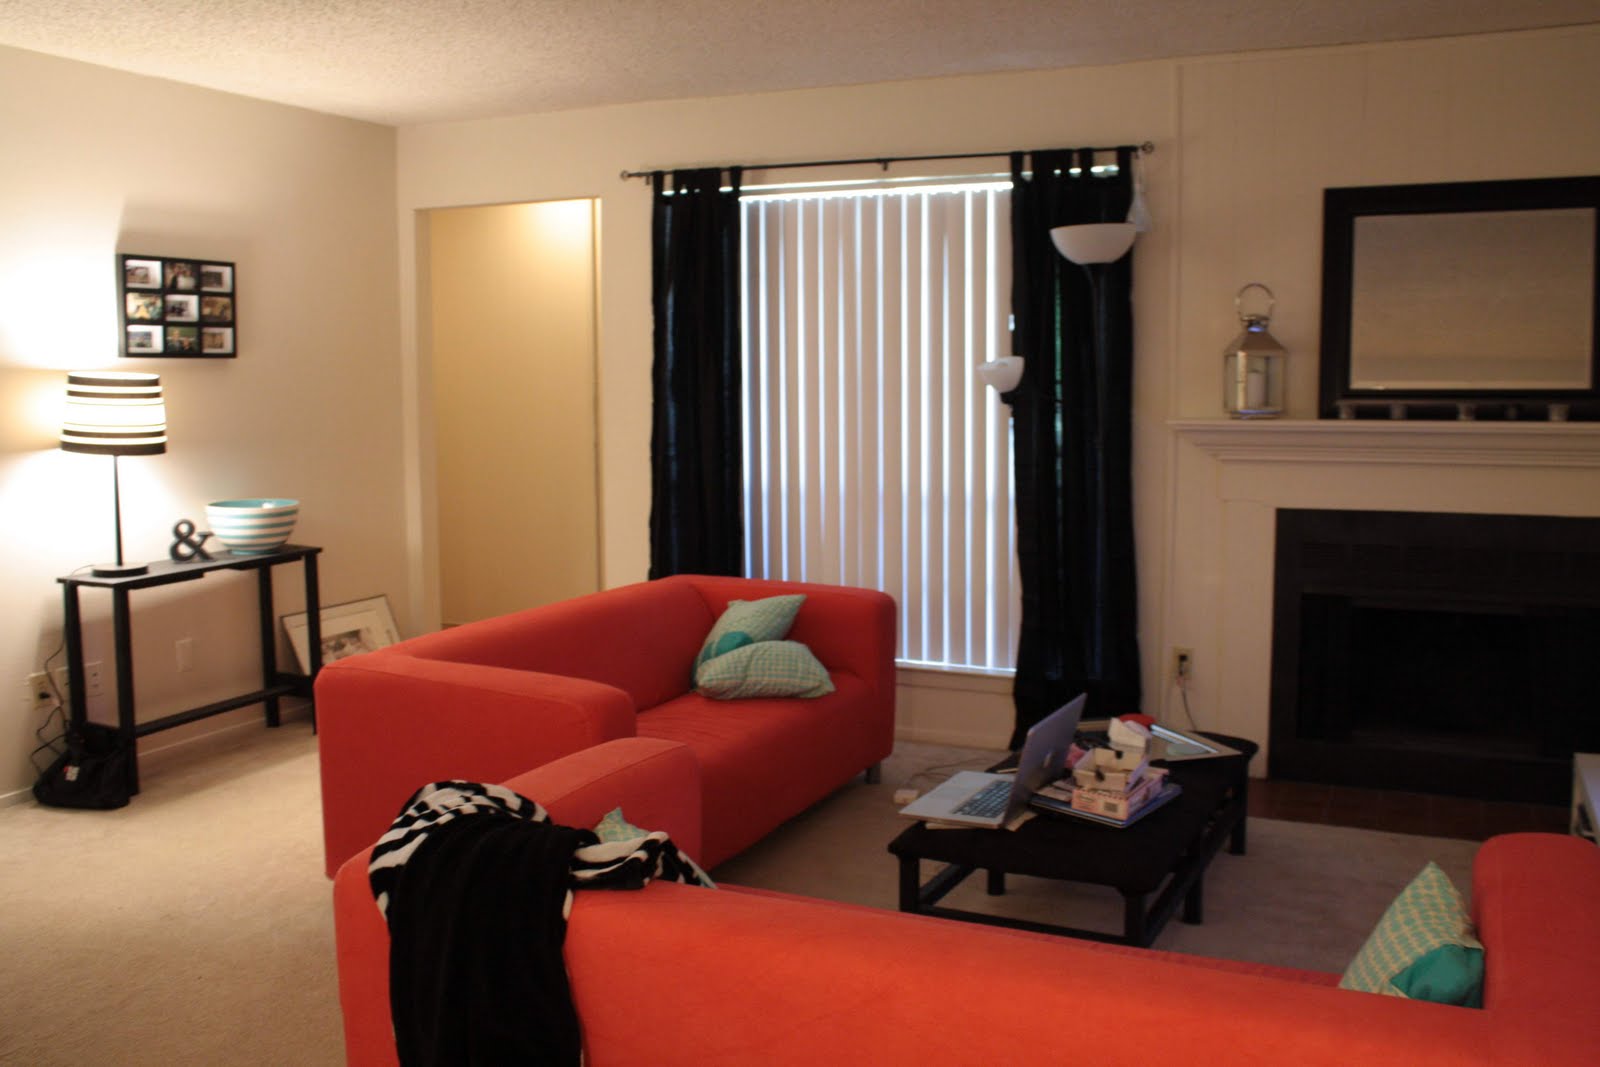
So what's a gal to do? She goes to the drugstore and buys a few bottles of RIT dye! The process is amazingly simple. Soak your slipcover in the bathtub, start your washer and follow the directions on the bottle. I used a mixture of purple and fuchsia to come up with this eggplant color. It was absolute perfection. I adored my purple couches, and if you take a look at the RIT website, the options really are endless! They have a gorgeous honeysuckle rose, the perfect shade of aqua, and so much more.

When it was time to move out of my apartment and into a home with my husband, I gifted both couches to a friend of mine. Her decor didn't include purple, however, so she bought two natural slipcovers and did a little dyeing of her own. These are actually crimson in person, not orange.


As you can see, I didn't have my camera settings quite figured out six months ago! These slipcovers are a lot cheaper than their leather counterparts, and can be a ton more fun. I tried to talk her into the aqua, but she opted for red. If I ever invest in another IKEA slip-covered piece, you can bet your biscuits I'll be dying it something bright and fun!

See more of the dyed Klippan slipcovers.

~ Brooke, Lake Jackson, Texas

Sater 2.5 seat sofa to leather chair


Materials: Sater 2.5 seat sofa (leather), assorted hand tools

Description: My roommate and I bought an IKEA Sater 2.5 seat sofa, and after about 6 months of normal use (never more than 2 people sitting on it, it snapped in half, folding like a hinge, with the frame resting on the floor. We lost the receipt, so we couldn't get a new one from IKEA :(

We put it up on cinder blocks for a few months, but when we moved apartments, I couldn't bear to throw it away, so I decided to chop it in half, reconnect one of the arms to the cut-end, and create an awesome chair.


I used a jigsaw, handsaw, utility knife and screwdriver to carefully peel back the leather, cut the appropriate boards and remove half the spring assembly. Once that was done, I took the vertical armrest off of the cut-end and began to secure it to the good half of the new chair. Because the legs are part of the vertical armrest, the process was that much easier.

I used steel mending plates (rectangular and L-shaped plates with screw holes) to brace all the new joints. I also used about a dozen 1" wood screws. Most of this process was freehand and improvised, but all the materials cost less than $40 at a local home improvement store.

Once the frame was assembled, all that remained was to stitch the leather back up (I'm still working on this, as you might notice from the picture). If you do this right, the new chair will be big enough for two, and you can either keep the side pillows or discard for more seating room.

This isn't a project you're likely to try unless your Sater has snapped like mine did, but I thought this was a cool hack nonetheless. Better to spend $40 and a Saturday and end up with a chair than to throw a whole couch in a landfill.


Thanks for looking!

~ Wes, Baltimore, MD, USA