A Rimfrost chandelier
Jim's hack was to make a more substantial chandelier.
He says, "I originally bought only one and it looked really sparse so I decided to increase it. This involves three Rimfrost pendant lamp shades.
I stared with a wooden disk, and tin material that I got from the hardware store. The tin comes in different patterns. The pattern I picked had small holes all over it, making it easy to put the screws thru and the nails to hold it into place.
Wrapped the edge of the wooden disk edge with the tin leaving a � inch extra on the top to make room for the wires, put small nails thru the tin holes to hold the edge on.
Then cut out a circle of the tin material to cover the bottom of the disk. Spaced out three holes for the wires and used the ceiling clips/loops to hold the wires above and in place.
Wires are Hemma with the plug cut off and spliced to connect to the ceiling wires. Wired the three lamps into the one switched outlet, and put large screws 6 of them up thru the disk directly into the ceiling to hold it into place. Voila, an inexpensive chandelier."
(And in case you're wondering about the gorgeous window, Jim's wife who owns SGO Designer Glass of Phoenix made it.)
Light play with the Regolit
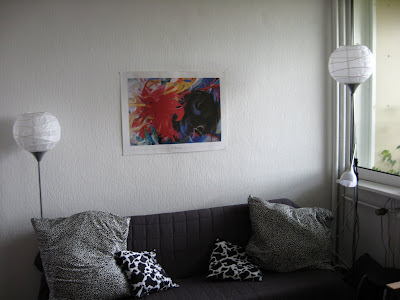
Nina was really tired of her Not floor uplights, so she mixed them with the Regolit lampshades. She tells me, "All it took was removing the original lampshade of the Not, cutting the wire in the smaller opening of the Regolit (the one on the downside when used as a pendant lamp) to make room for the lightbulb, putting that side on top of the Not and then fixing it there with some adhesive tape. The upper opening is big enough to change the light bulb if needed, so the lamp shades don't have to be removed.
Since I wasn't sure it'd work on first try and Regolit lampshades cost only 1 � over here in Germany, I bought five of them, just in case. It worked like a charm without me messing a single one up, so after pimping my two Nots, I still had three Regolits to play with.
I attached two of them to each other with some wire to get a pendant lamp for my bedroom.
The last one is now my bedside lamp. I simply put the base of an old lamp into it and tore a small hole into the paper (using adhesive tape to prevent it from widening) to let through the cable.
One of the original NOT lampshades is now used for a pendant lamp, btw.
Since you just posted all those gorgeous bedroom room dividers, I'll send you mine too, which is nowhere near that nice, once again not really a hack but also extremely simple and cheap. I just mounted an INDEX curtain rod http://www.ikea.com/us/en/catalog/products/50079374 to the ceiling and hung BOMULL bedspreads http://www.ikea.com/us/en/catalog/products/10075636 using ADELE curtain rings with clips http://www.ikea.com/us/en/catalog/products/50079374. It does it's job hiding my hideously ugly wardrobe and it goes surprisingly well with the REGOLITs.
Make no bones about this Grono
Andreas has this great idea of covering his Grono lamp with an old x-ray. I must say the results are quite Xtraordinary.
Fado street lamp
Mathias made some changes on a Fado lamp and the Not floor lamp. He says, "The globe fit perfectly, and gives a very nice glow. I also combined the lamps to get the look of a street lamp."


No comments:
Post a Comment