linus from sweden modifies a malm drawer unit for his media paraphernalia.
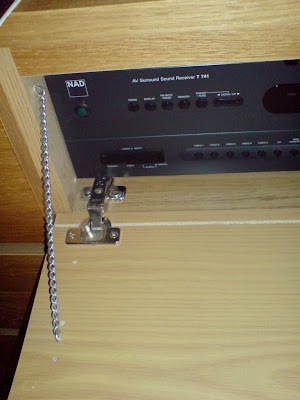
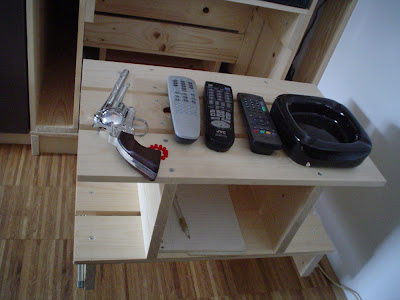
linus says, "this is a modification i did to a malm about a year ago. basically the idea was to be able to hide my receiver and DVD-player as i really didn't want to see them. i can still use the remote control since i have an infrared extender with one end in the former drawer and the other outside.
once i had unpacked it and figured out how it was supposed to be assembled i started modifying it. shelves were made from spare shelves from an ikea wardrobe. by using them as raw material i could save the finishing on the outer side so that the shelves would also look like oak. cutting them was done using an electric jigsaw. my entire apartment was filled with sawdust as ikea particle board shelves more or less fall apart when sawing through them.
the shelves were fitted in the 'housing' using plugs - this way i can actually disassemble the malm and convert it to a standard one, if needed.
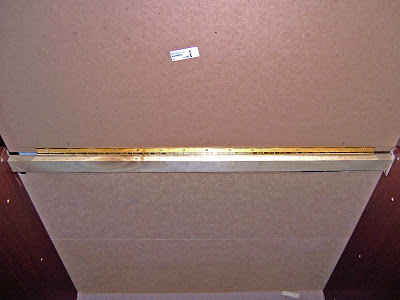
next came the most tricky part: the hinges. the hinges used are the same type that are used for kitchen cupboards when you want to get a flat surface. to get the positions right, i built a dummy from spare parts, just to be see where the holes should be. drilling the 36 mm holes where the hinges folds down into was tricky as they partly covered the track in the front normally used for the bottom of the drawer. i used a hand held drill, it would have been way more steady with a proper rig.
the result was not perfect, the holes are slightly out of place, but by using the built in adjusting screws in the hinges you can't tell that they are not level.
as expected, the hinges could not take the horizontal load. they are designed for vertical use, so when i or some friend accidentally opened the doors too hard or placed something on top of them you can hear the screw trying to pull out of the particle board (which is not exactly good to screw things to from the beginning). so i had to add the chains to ensure disaster is avoided.
total build time for this project was about 20 hours, with the help of one friend. planning the project and figuring out how to fit the hinges took at least at much time. in the end i'm very happy with the result!"
Thursday, 29 November 2007
malm media unit with flip down doors
Wednesday, 28 November 2007
hacks for the holidays
two little hacks to get us in the festive mood.
a polarvide santa suit
sabine from germany sent me this some time ago but i decided to keep it for the holidays. "for a christmas party, we made out of 2 red polarvide throws and a litte bit of plush, a santa claus costume. it was a cheap and fast way to have a costume."
see more of sabine's santa.
an ikea menorah
anna of forty-two roads makes a modern hanukkah menorah with an ikea candle holder.
just hammer some tacks into the center of the metal cups in the hallare candle holder to hold the candles upright. after placing in the candles, add some white rocks (florera) for stability.
see more of anna's hanukkah menorah.
Tuesday, 27 November 2007
buffalo bill wardrobe and room divider
i love this amazing wardrobe room divider from wouter. you'll never guess, underneath all those horns is a plain old pax wardrobe.
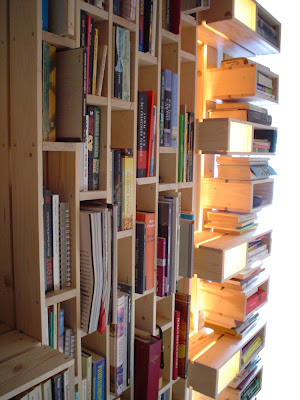
wouter says, "i was asked to make a cloakroom/bookcase covering this massive wardrobe for a new apartment to divide the bedroom from the corridor. the wardrobe is ikea (pax nexus?) for sure (as seen as on the bad picture of course - the 'before' situation).
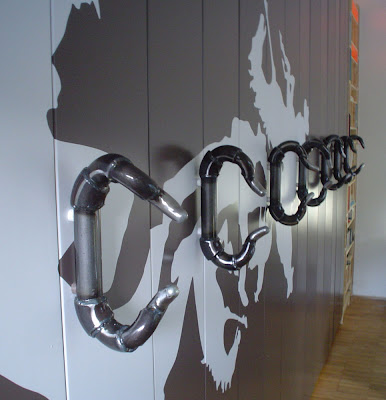
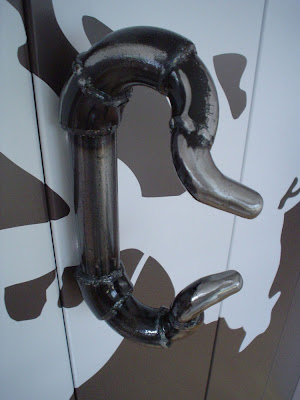
the front (or back of the wardrobe) is based on a custom made pallet, the wardrobe is still the wardrobe, painted in colour (buffalo, true) by hand, the graphic is an adhesive label and the seven handles are made by an artist specially for this furniture. she's a welder, and she decided to make them from prefab steel curves, i was very content with the results. finally i brought them to a car sprayer, and he coated them transparent.
the results are quite pure, only screws (unfortunately we didn't use the socket wrench) - which meant no glue or anything, FSC wood, water based paint, metal, the tag and some hidden lights and personal gadgets.
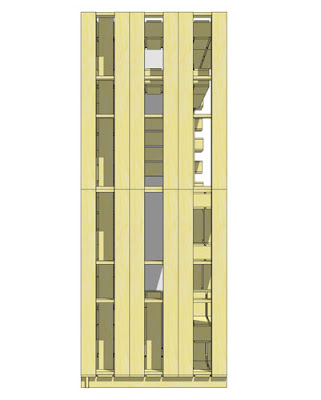
plan and construction was realised in about two weeks, late night workshop hours, but lots of fun and very satisfying in the end. so please... do it yourself (drawings included)."
credits:
palletstyle: wouter
construction: wouter and timo baerwaldt
graphics (and theme): annelies van limbeek
handles: christel kanbier
thanks to fransje
wouter says, "i was asked to make a cloakroom/bookcase covering this massive wardrobe for a new apartment to divide the bedroom from the corridor. the wardrobe is ikea (pax nexus?) for sure (as seen as on the bad picture of course - the 'before' situation).
the front (or back of the wardrobe) is based on a custom made pallet, the wardrobe is still the wardrobe, painted in colour (buffalo, true) by hand, the graphic is an adhesive label and the seven handles are made by an artist specially for this furniture. she's a welder, and she decided to make them from prefab steel curves, i was very content with the results. finally i brought them to a car sprayer, and he coated them transparent.
the results are quite pure, only screws (unfortunately we didn't use the socket wrench) - which meant no glue or anything, FSC wood, water based paint, metal, the tag and some hidden lights and personal gadgets.
plan and construction was realised in about two weeks, late night workshop hours, but lots of fun and very satisfying in the end. so please... do it yourself (drawings included)."
view from right
credits:
palletstyle: wouter
construction: wouter and timo baerwaldt
graphics (and theme): annelies van limbeek
handles: christel kanbier
thanks to fransje
Monday, 26 November 2007
a virtual reality ikea hacker
this is an interesting one from ben. it's not a hack, but a virtual hack!
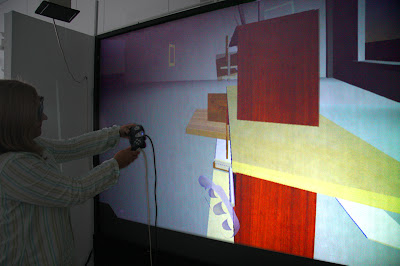
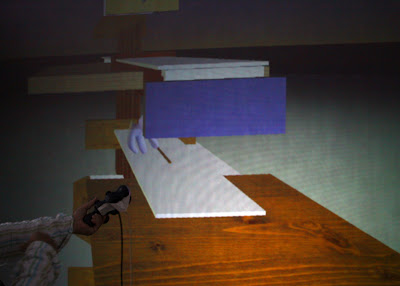
he says, "i made, not exactly an ikea hack, but a virtual ikea hack. it's a vr cave environment where you get to cross-breed ikea (for example, leksvik desk + billy bookcase) to get these strange mutations and constructivist sculptures.
oh, actually there is kind of an ikea hack in there. the projection screen is a 2-projector stereoscopic immersive display. one of the challenges in setting up these VR systems is precisely aligning two video projectors; usually they're stacked, and have to be very carefully angled so the images map up. there are slide projector racks out there that do this, but they're really large, and not so easily available anymore; and VR is such a niche market that there are not many products specifically for this. we got a 1' x 1' shelf and 4 metal legs (about 6" long) with threaded feet for adjusting the height. i think they were for an entertainment center or something. this makes a very nicely adjustable projector rack."
see more pictures of it at www.bcchang.com
Friday, 23 November 2007
a bedside beauty
need a sexy bedside table? jason shows us how.
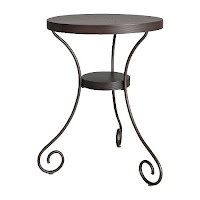
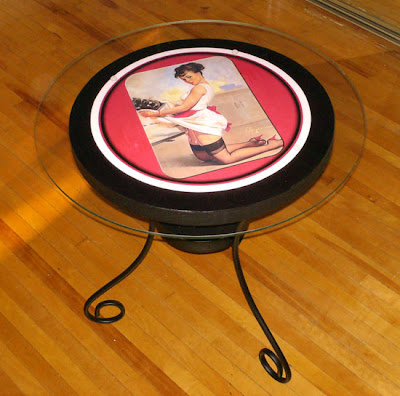
"my girlfriend recently moved into a new apartment and was thinking of a cheap bedside table. she had a piece of circular glass she got from somewhere and thought maybe it could be placed on something (a planter?) after looking for a suitable host - and failing - we saw the noresund table at ikea: 19.99! the price can't be beat but it was a little uninspiring, looks wise.
i had printed up some vintage pin-ups for her wall, so she suggested i put one on the table top. a wonderful idea. i played around in photoshop with a gil elvgren work (the best pin-up artist ever) and got the design right, had it printed and mod podged that baby on there.
one note on assembly: to make sure the image was centered, i drew diagonal lines from corner to corner on the printed image, then drilled a hole in the center of the table to ensure everything was perfect.
i also glued it to the table and then let that dry before sealing with the mod podge - the wetness from the glue can separate the printed layer from the paper on certain types of prints. the glass was a nice finishing touch, but it is by no means required. the table is a beautiful conversation piece that came in at around 30 bucks. i know it's just a simple mod podge job but you never know what might catch someone's fancy, and it's worth knowing that the noresund is just begging to be adorned with the sexy image of your choice."
"my girlfriend recently moved into a new apartment and was thinking of a cheap bedside table. she had a piece of circular glass she got from somewhere and thought maybe it could be placed on something (a planter?) after looking for a suitable host - and failing - we saw the noresund table at ikea: 19.99! the price can't be beat but it was a little uninspiring, looks wise.
i had printed up some vintage pin-ups for her wall, so she suggested i put one on the table top. a wonderful idea. i played around in photoshop with a gil elvgren work (the best pin-up artist ever) and got the design right, had it printed and mod podged that baby on there.
artwork and table design
one note on assembly: to make sure the image was centered, i drew diagonal lines from corner to corner on the printed image, then drilled a hole in the center of the table to ensure everything was perfect.
i also glued it to the table and then let that dry before sealing with the mod podge - the wetness from the glue can separate the printed layer from the paper on certain types of prints. the glass was a nice finishing touch, but it is by no means required. the table is a beautiful conversation piece that came in at around 30 bucks. i know it's just a simple mod podge job but you never know what might catch someone's fancy, and it's worth knowing that the noresund is just begging to be adorned with the sexy image of your choice."
a photo frame clock
clocks are turning out to be one of the favourite items to hack. joyce sent me her rusch wall clock that doubles up as photo frame.
"i dismantled the clock and traced the outside of its insert on a 8x10 photo. cut the photo into a circle with a hole in the middle and reassembled my clock. now i have a great bathroom clock that frames a pleasant memory from a trip to Japan. a new way to showcase your favorite photos!"
Updated! February 23, 2009
Laura's Loteria Rusch
Laura adds bright yellow paint and loteria cards to her Rusch.
See more of Laura's Loteria Rusch Clock.
other clock hacks:
- ribba clock
- a bamboo clock
- time bomb clock
- rusch's clock new face
- an international analog clock
"i dismantled the clock and traced the outside of its insert on a 8x10 photo. cut the photo into a circle with a hole in the middle and reassembled my clock. now i have a great bathroom clock that frames a pleasant memory from a trip to Japan. a new way to showcase your favorite photos!"
Updated! February 23, 2009
Laura's Loteria Rusch
Laura adds bright yellow paint and loteria cards to her Rusch.
See more of Laura's Loteria Rusch Clock.
other clock hacks:
- ribba clock
- a bamboo clock
- time bomb clock
- rusch's clock new face
- an international analog clock
Thursday, 22 November 2007
redeeming the dalselv bed
i got to agree with ashiado that the dalselv headboard is too tall and thin. she cleverly hacked the headboard, retaining its design but bringing balance to its overall looks.
"the dalselv bed came pretty close to what we wanted except that we didn�t like the head board. actually, rephrase: we hated the original headboard! especially with how high it was. to us it just seemed like an awkward design. but with a couple of very simple hacks, we turned it into something we like and continue to use.
we went to a hardware store and purchased 6 wooden dowels to replace the thin metal dowels of the original head board (see the three black vertical spindles on each side of the head board).
then we cut the 3 bed posts of the head board (left, center and right) down to the height of the middle horizontal beam of the head board. last, we took the horizontal beam from the very top of the original head board and screwed it directly into the top of the middle horizontal beam. this gives the bed a much more stable feeling and, in our opinion, a more elegant look."
Wednesday, 21 November 2007
chopping board to bathroom shelf
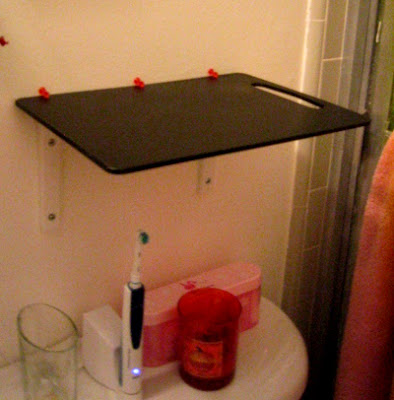
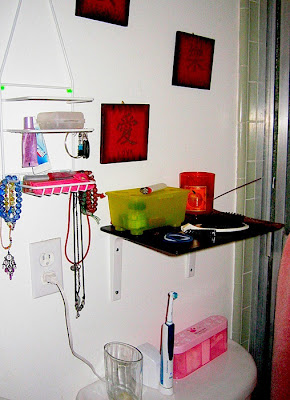
here's a quirky one from karen. she wanted a bathroom shelf but was on a super-tight budget, plus the fact that her bathroom was, as she terms it, painfully narrow.
"i wanted something that i didn't have to saw or cut in half, was moisture-resistant, but was still durable enough to withstand the weight of a few bottles and jars.
i purchased a black legitim chopping board and two stodis brackets. screwed my brackets into the wall, placed the chopping board on top, secured it with a couple of pushpins, and voila! brand new, easy-to-clean, sturdy shelf."
Tuesday, 20 November 2007
a desk of flowers for maisie
kristy's desk set-up for her daughter maisie is so pretty. in comparison, my all white and aluminum work station now looks totally blah.
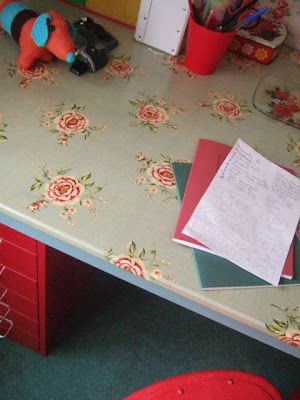
the table is the humble ingo. maisie painted the legs and kristy overlaid the table top with a piece of lene bjerre oilcloth, that used to be her table cloth. it is just staple-gunned to the underside of the table. the drawer unit is a helmer.
see more of maisie's desk or kristy's corners flickr set.
Monday, 19 November 2007
some questions ....
any ideas for a built-in ironing board?
linda is wondering if "a nice hacker somewhere has figured out a built-in/slide out ironing board that can be used in pax. it would be so convenient, don't know why ikea hasn't made one."
you know the name of this?
denise needs the name of these acrylic photo frames attached with a thin wire.
if you do, just leave a comment. thanks.
children's book storage
allyson inspired by saw this post on apartmenttherapy: nursery a couple of months ago created her version using a stripa wall shelf and a sheet of acrylic.
"we had the acrylic cut at a local glass shop, and had them round the corners and drill three holes toward the bottom. we bolted the plastic through the pre-drilled holes in the shelf (we added one in the center for extra support) and attached the whole thing to the wall with a few L-brackets. it was so easy, and cost less than $30!"
Thursday, 15 November 2007
kid's bed with a little cupola
caroll gets creative for her daughter's bed.
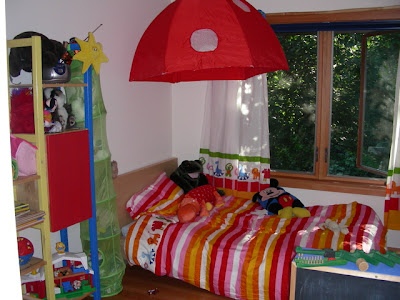
"recently, i went on a big shopping trip to ikea, because my toddler needed a new bed. i was very disappointed in what ikea has on offer by way of kid's beds: they are mostly toddler beds, which are too small for a kid who has already outgrown a crib. i like 'modern' lines, but can't afford any of the furniture sold as modern, and much as i love the haba line of kid's furniture, that was just far too expensive for me.
of the few twin beds ikea has on offer, the malm came closest to my style. but i wanted to do something to make it fun. i seem to remember ikea use to have some nice canopies and things for twin-sized beds, but i didn't really see anything i liked until i spotted the korall anemon tent. i figured there must be some way to do something cool with it, so i bought it and brought it home to experiment.
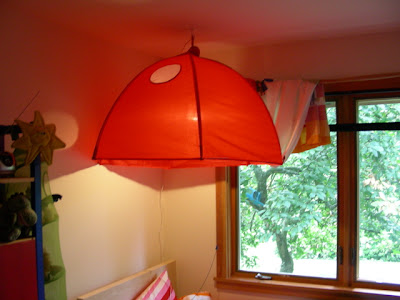
after some fiddling around, i decided there was no way to use it immediately around the mattress to create a little hidden space at the head of the bed; it was too small and i had some qualms about the safety of that approach in case of a fire. so i decided to cut the bottom out and suspend it from the ceiling, like a little cupola.
my daughter just loved it! i just hung it from a hook in the ceiling, so that we can take it down and play with it when she wants to. i took the velcro strap off of it and sewed that into a loop to hang the tent by. i was originally going to sew up the opening side of the tent to make it look tidier, but since we like to play with it, i've left it closed with just the velcro patches.
after a few days, i thought 'wouldn't it be cool if this had a light under it to make a cozy place to read our bedtime stories?'. i just suspended a basisk pendant lamp from the same hook, pulling the cord through the side slit in the tent.
we plugged the lamp into a dimmma switch. my daughter just loves it too."
lack coffeetable with painted squares
sayani painted over her lack coffee table. definitely less boring but i would suggest losing the flowers though.
Wednesday, 14 November 2007
a ramberg laundry hamper
joan sends in her version of a large capacity laundry hamper, made from a ramberg chest.
she writes, "i started with a ramberg chest with 3 drawers. picture 1 is the final result, picture 2 is opened hamper.
the idea was to gut the interior to make a presentable, large hamper. (picture 3 is interior, picture 4 is the back support for the lid)
none of the interior drawer parts were used. the extra parts are:
related hacks:
> how's this for a big capacity laundry bin?
> a neat and slim laundry hamper
she writes, "i started with a ramberg chest with 3 drawers. picture 1 is the final result, picture 2 is opened hamper.
the idea was to gut the interior to make a presentable, large hamper. (picture 3 is interior, picture 4 is the back support for the lid)
none of the interior drawer parts were used. the extra parts are:
- some 1" by 1" boards to support the front sides
- a 1" by 2" by 34" board to support the hinge for the top
- a 1" by 2" by 34" board to support the hinge for the bottom front
- a slab of masonite to fill the bottom (the drawer parts were too narrow)
- and of course a 30" piano hinge
related hacks:
> how's this for a big capacity laundry bin?
> a neat and slim laundry hamper
Monday, 12 November 2007
vilan recliner goes deeper
simon bought a vilan recliner (can't find the link on ikea's website) but it didn't lean as far back as he wished for him to kick back and relax.
he says, "it's a comfortable chair but it doesn't recline nearly far enough to let me relax, so i hacked it.
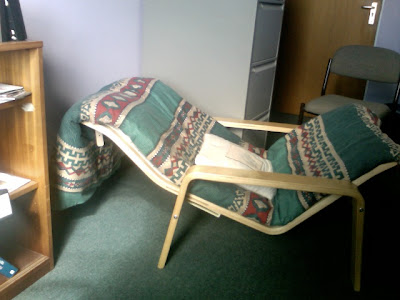
here's the result. the first picture has the chair with a wall behind it. the wall supports the top of seat and stops it tipping back, so you use the chair in this position when you want to sit up. i've taken the padding off so you can see the position properly.
the second picture has the seat in fully reclined position, with a single-bed quilt for padding and a cushion to support the lower back. in reclined position the chair is perfectly balanced, extremely comfortable, and has a little freedom of movement so you can tilt it slightly forward or backward as you prefer.
the hack requires no extra parts, merely the removal of some components you put in originally and a repositioning. first you detach the seat from the stand. here are the pieces i removed:
the screws attach the seat part to the two runners at the front of the supporting stand. the rods and washers suspend the seat between the arm rests of the stand. once these are removed you have two separate parts, the seat and the stand.
the secret to proper reclining is to reverse one part: put the seat on the stand backwards. once you've done this, you're left with a seat which can recline all the way flat. the only thing to watch out for is keeping your hand out of the armrest area as you change from upright to reclined and back again."
Subscribe to:
Posts (Atom)