Showing posts with label media storage. Show all posts

Tuesday, 28 May 2013

Vintage Look Tarva TV Console


Materials: Tarva 6-Drawer Chest, Decorative Knobs, Wood Stain & Paint

Description: Well once again we were on the hunt for an entertainment center, but IKEA's selection came up a little short. The have a lot of "vintage" look items, but their TV consoles seem to be pretty modern across the board. Not to mention, a unit with sufficient storage can get pretty pricey.

Luckily for us DIY-er's, they have the Tarva line of unfinished wood products. Thus, we were able to get the 6-drawer chest for a whopping $149.00. Even out-of-the-box, the chest is a great substitute for an otherwise pricey entertainment center.

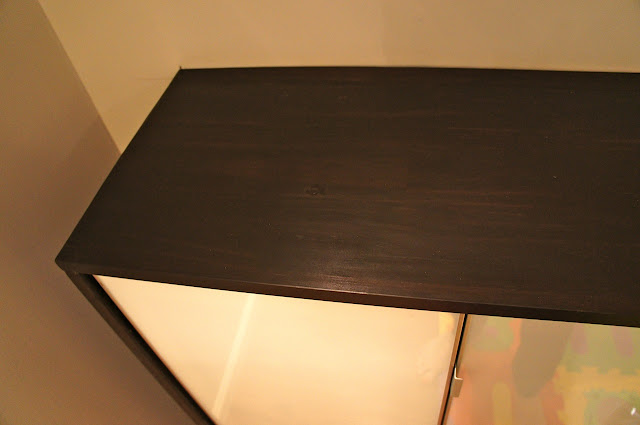
To go along with our theme though, the chest needed a little face lift. A small can of some "espresso" wood stain for the drawers and a large can of some "ebony" wood stain for the frame and we were off to a good start...


After applying the stain and letting that dry (no polyurethane was applied), we assembled the dresser. With the drawers left out, we lightly brushed a thin layer of some cream colored latex paint to the frame of the dresser.

For the final touch, we opted to use some decorative pull knobs from our local hardware store instead of the basic ones supplied with the dresser.

All in all, this was a very simple hack with absolutely great results. We had originally planned to use casters, but were happy with how it currently sits.

~ Christopher Clemons, Florida

Friday, 24 May 2013

Easy Mid Century Ikea Credenza


Materials: 2x4 Expedit, hairpin legs, wood

Description: After moving, I had two problems that needed solving. First, I needed a place to put my record player and I had a 2x4 Expedit that I no longer needed. Rather than just turn it sideways and put my stuff on it, I decided to remove one of the smaller boards to make room for my receiver as well.


I also decided to put four hairpin legs on my bookcase which I did by first getting a board that was 1x3 ft. and spray painting it black. I then attached it to what would be the bottom of the credenza by getting some wall anchors, putting them into the bottom of the Expedit, and attaching the board to it.

Then it was just a matter of screwing the hairpin legs into the board. I was sure to use screws long enough to go both threw the board and into the Expedit for added stability. I finished it off with two drawers that I had and two DRÖNA boxes.

~ Dave, Texas

Friday, 26 April 2013

Billy library to entertainment center


Materials: Billy bookcases, Besta TV stand, Framsta panels

Description: We converted our guest bedroom into a TV viewing area and needed a wall unit that would hold a 42 inch TV as well as a boatload of books. Because the unit was being placed on the wall where the door opens, we only had about 8.5 feet of clearance. Most entertainment systems were either too long to clear the door or too short and would not fit all our books. Even at IKEA the majority of options were 15 or 30 inch wide bookshelves and 47 inch TV stand.

We decided to use our existing Billy bookcases and hack it to what we needed. We were staring with 2 24 inch bookcases (no longer available), 1 30 inch bookcase and 1 end unit (also no longer available). We gave away the 30 inch bookcase and used the rest for our hack. The length was exactly what we needed when combined with the Besta TV stand, but we ran into an issue with color. Since our Billy bookcases were years old, they were in a color no longer offered. We decided beech would be close enough considering most of it would be covered.


We assembled the TV stand with doors, casters and the Framsta panels and placed it in between the bookcases. We took apart the Billy end piece and had the 2 sides cut down to the same length as the Besta cart to create the overhead shelf. We also had one extra piece cut to create a divider in the middle. We usually take these to Home Depot or Ace Hardware - they will cut materials you didn't purchase in store. The bottom shelf we screwed directly into the sides of the bookcases. The Framsta underneath provides extra support to keep it from drooping in the middle with the weight of the books. The top shelf was attached with flat metal brackets.


To create a more finished look, we took the back panel from the left side of the Besta TV stand (which we wanted open to run cords anyway) and cut it in half along the seam. It fit perfectly into the overhead shelf once the divider was put in. These are not attached in any way but have managed to stay put on their own.

For the glass top, we could not purchase the standard ones because they are the full depth of the Besta, but the Framsta takes up a few inches. We needed the top due to the color variation so we purchased an extra set of Framsta glass panels and layered them to cover the surface.


Lastly, we reused the 12 inch square shelves from the end unit in a dead corner in our living room using shelf brackets purchased at The Container Store.


~ Stephanie, Atlanta

Wednesday, 24 April 2013

Kitchen Cover Panels for Media Center wall


Materials: Cover panel for high kitchen cabinets, and two horizontal kitchen cabinets

Description: I started out by taping the outline of where I wanted to mount the cover panel. In order to have the cabling for the TV hidden behind the panel, I screwed 1½" strips of lumber vertically into the wall studs the entire width of the panel. The cover panel was then screwed onto the lumber strips. For stability, I used many screws behind where the TV would ultimately be. The only visible screws were placed in the four corners, and the screw heads hidden by hot-gluing decorative buttons over them. The flat-screen TV mount was then screwed onto the panel, a hole cut through the panel for the cables, and finally the TV was attached.


The cabinets below are two horizontal kitchen cabinets, with cover panels added to the top and sides. 8" legs, spray-painted black, were added to the bottom of the cabinets, and the two cabinets screwed together. And I'm happy to report that the remote control works through the frosted glass!

~ David, Minnesota

Friday, 12 April 2013

Easy (really easy) way to change Expedit Shelving into a media centre


Materials: Expedit Shelving, saw.

Description: Easy (really easy) way to change Expedit Shelving into a media centre.

EXPEDIT shelving unit beech effect: Article Number: 501.030.86
EXPEDIT Insert with door, high-gloss grey x 4 Article Number: 401.982.02

And instructions for putting the shelves together.

Follow instruction of the above manual as far as number 4 on page 10.

There are 3 long panels in the pack (red dot), two are used as per instructions (one at each end of the shelving unit), but the third one is place perpendicularly to the other two.


So the next step is to take this long panel, 4 dowels (118740 which you cut in half) and then insert these half dowels into the central holes until they are flush with one surface and protrude on the other.

There are 4 small panels (blue dot), you will use three of them and one will be discarded.

One is already in place according to the instructions, and the second one will be placed in the normal way at the other end of the unit. The third one (blue dot) is now fixed to the long panel (red dot) via the protruding dowels.

You now have a T shaped shelf which you place into the unit in place of two of the short panels, it forms a large shelf on which to place your media equipment.

The rest of the construction proceeds as the instruction booklet.

Once the piece is assembled you place the four insert cupboards in the bottom half of the unit. As well as providing space for your CD/DVDs it hides all the wiring of the media equipment.

~ Michele Findlay, Seaford

Wednesday, 27 March 2013

Carpet turned to Entertainment Centre backing


Materials: 1 x VINDE Carpet, 2x BENNO DVD Tower, 1x LACK Wall Shelf, 1x LACK Regal, 6x CAPITA Legs

Description: My wife is tired of cleaning the carpet everyday and we decided to change it but we don't want throw it away. I thought it might be good to use it as wall carpet with the wall mount TV to hide the cables :)

1st, I mounted the LACK shelf as the same height of the BENNO DVD Tower.
2nd is the carpet using wall plugs, screws and washers then mounted the TV (I made a small cut on the carpet for the cables)
3rd the BENNO DVD tower
4th finally the 6 CAPITA legs to the LACK Regal but I removed the 2 dividers so I can put the amplifier.

See my other hack: DJ Stolmen STUDIO

~ DJ MX3, Dubai, UAE

Tuesday, 19 February 2013

Expedit one2two


Materials: 5x5 Expedit, some wood screws, additional metal L-bracket

Description: I'd like to show you my first IKEA hack! Time effort approximately 4 hours.

Because we moved around the furniture in our sharehouse living room the 5x5 Expedit didn't fit anymore into its desired corner. The idea was therefore to clip it into the right size and reuse the clipped part to replace the ugly old TV shelf.


before

First I cut the upper and lower thick boards just after 3 compartments. The resulting 5x3 mini Expedit was stabilized with a few screws from the side and a L-profile on the top and bottom end each. The cut edge could be covered, but as the shelf is placed really close to the wall nobody will see anything from the cut ever.


Thereafter I assembled the remaining 3 thick outer boards, including one row with the thin boards again. To make it stable 2 white L-brackets were screwed on the front side and another thin original board was attached at the rear. Additional screws were placed at the intersection of the thin boards from below. In doing so the "new" TV shelf can bear quite some weight again and nasty cables can be hidden in the same time. The cut edges are facing to the ground now and cannot be seen as well. Attaching some felt, the parquet is protected against scratches.


~ Damian, Switzerland

Rubrik Cabinet Door Storage Solution


Materials: Rubrik glass cabinet door, Akurum wall cabinet frame, Besta media cabinet

Description: I found these Rubrik glass cabinet doors on clearance at Ikea for $5 each, while in the midst of a basement renovation. We were looking to add built in storage as well as hide an ugly gas meter, and these doors were perfect. They were 39", so they could only be used as wall cabinets. We ended up hanging 4 30x39" Akurum wall cabinet frames 1" off the floor against the back of the room.


The cabinet tops themselves were not meant to be seen, so we created a waterfall counter by joining a 1" x 12" piece of pine board (which is actually 11 1/4") with a 1" x 3" (which is actually 2 3/4"), by screwing the pieces together from the back with decking screws, thus enabling the counter to reach the depth of 13" of the Akurum frame and Rubrik door. This allowed for a slight overhang, and then we screwed the same things into the side of the cabinets. Before attaching the counter I stained it with Minwax Kona stain, and then sealed it with Minwax Paste Finishing Wax, to make the counter water-proof.


Hiding the gas meter was a bit trickier, and was accomplished by our contractor, who complained and threatened to charge us double the quote for the labor, but in the end he even agreed that it came out very nicely. He hung one Akurum 36" x 39" frame and built a wood frame around the gas meter next to it. He then sheet-rocked in the frames, and hung the doors. He had to use sheetrock rather than just hanging the cabinets because of the size of the gas meter. Beneath it we hung a Besta media cabinet.

~ Michelle Servary

Tuesday, 12 February 2013

Rubrik Cabinet Door Storage Solution


Materials: Rubrik glass cabinet door, Akurum wall cabinet frame, Besta media cabinet

Description: I found these Rubrik glass cabinet doors on clearance at Ikea for $5 each, while in the midst of a basement renovation. We were looking to add built in storage as well as hide an ugly gas meter, and these doors were perfect. They were 39", so they could only be used as wall cabinets. We ended up hanging 4 30x39" Akurum wall cabinet frames 1" off the floor against the back of the room.


The cabinet tops themselves were not meant to be seen, so we created a waterfall counter by joining a 1" x 12" piece of pine board (which is actually 11 1/4") with a 1" x 3" (which is actually 2 3/4"), by screwing the pieces together from the back with decking screws, thus enabling the counter to reach the depth of 13" of the Akurum frame and Rubrik door. This allowed for a slight overhang, and then we screwed the same things into the side of the cabinets. Before attaching the counter I stained it with Minwax Kona stain, and then sealed it with Minwax Paste Finishing Wax, to make the counter water-proof.


Hiding the gas meter was a bit trickier, and was accomplished by our contractor, who complained and threatened to charge us double the quote for the labor, but in the end he even agreed that it came out very nicely. He hung one Akurum 36" x 39" frame and built a wood frame around the gas meter next to it. He then sheet-rocked in the frames, and hung the doors. He had to use sheetrock rather than just hanging the cabinets because of the size of the gas meter. Beneath it we hung a Besta media cabinet.

~ Michelle Servary

Thursday, 7 February 2013

Expedit one2two


Materials: 5x5 Expedit, some wood screws, additional metal L-bracket

Description: I'd like to show you my first IKEA hack! Time effort approximately 4 hours.

Because we moved around the furniture in our sharehouse living room the 5x5 Expedit didn't fit anymore into its desired corner. The idea was therefore to clip it into the right size and reuse the clipped part to replace the ugly old TV shelf.


before

First I cut the upper and lower thick boards just after 3 compartments. The resulting 5x3 mini Expedit was stabilized with a few screws from the side and a L-profile on the top and bottom end each. The cut edge could be covered, but as the shelf is placed really close to the wall nobody will see anything from the cut ever.


Thereafter I assembled the remaining 3 thick outer boards, including one row with the thin boards again. To make it stable 2 white L-brackets were screwed on the front side and another thin original board was attached at the rear. Additional screws were placed at the intersection of the thin boards from below. In doing so the "new" TV shelf can bear quite some weight again and nasty cables can be hidden in the same time. The cut edges are facing to the ground now and cannot be seen as well. Attaching some felt, the parquet is protected against scratches.


~ Damian, Switzerland

Wednesday, 30 January 2013

IKEA featuring JBL


Materials: IKEA Best�, chipboard, JBL 15", basport & Zachry amp

Description: This hack is in the "?�noticed but not seen" approach!

I was disappointed of the Sony sub I had and also wanted a very clean installation in my living-room. So an idea grew in my mind and after some calculation I found a great JBL speaker that was able to handle both small boxes and high power, so together with my 400W Zachry that not was used for another project they fitted very well in to the volume of a Best� shelf.


The Best� was already in the living room so it was dismantled and some chipboard replaced some of the parts and some was also added in order to stiffen the box. Some attenuation material was added in the box as well.

The loudspeaker was then simply fitted together with the amplifier & basport into the upgraded Best�. The result is definitely not liked by the neighbors, but by me.

See more of the Besta sound system.

~ Fredrik, Malm�, Sweden

Monday, 28 January 2013

Invisible flat screen TV suspension on SLOPING wall


Materials: IKEA REDD shoe rack

Description: Unfortunately the REDD shoe rack is out of production now, but there must be thousands of them out there...
1. Cut off the folded edge at the bottom of the shoe rack with an angle grinder or hacksaw.
2. Cut off the corners (e.g. in an angle of 45o) on the part that will be placed on the sloping wall. This will make the suspension even more ??"invisible".
3. Find/buy 4 bolts that fit into the mounting holes on the back of your TV. Be sure that they have the right length.
4. Place the shoe rack on the backside of your TV and determine where to place the four bolts. (see picture) Be sure that the top of the shoe rack is placed so it cannot be seen from the front of the TV - but also so the top edge of the TV does not touch the sloped voila!
5. Precisely mark the spots for the 4 bolts and use your drilling machine..
6. Find the right place on the sloping wall for your TV and place the shoe rack there. Use some appropriate screws to fix the shoe rack on the wall. You might have to drill 2-3 extra holes for some screws "??behind" the big holes in the top of the front of the shoe rack. Be sure that the wall is strong enough for the weight!
7. Now you are ready to fix the TV on the shoe rack... and you will see it "??soar" in the room.

~ Leif S�nderby, Harlev, Denmark

Wednesday, 23 January 2013

Mammut Retro Arcade Cabinet


Materials: Mammut Children's Shelf Unit

Description: About a year ago I bought an X-Arcade Tankstank, a pro-quality joystick designed mainly for playing retro arcade games. The joystick itself was fine, but playing with an arcade stick on the sofa didn't feel right, so I set about creating a more arcade-like experience.

I didn't have the time, space or budget for a full replica arcade machine, but what I did have was a spare 32-inch LCD TV, so I set about finding a piece of furniture that could house it.

The unit had to be sturdy and it had to fit in with the look of our summer house, which is basically a room for my three year old son. When I saw the Mammut shelf unit in IKEA it seemed like the perfect thing.


Step one was to find a way to mount the television. I bought a cheap �10/$15 LCD wall mount bracket from the local supermarket. I then used half inch square metal tubing to build a couple of uprights coming out of the top of the Mammut.

For strength I bolted them through the sides, and angled them so that they exited at the top of the rear of the unit. An old wooden shelf joined the two uprights across the top and gave a mounting point for the TV bracket.

The Tankstick is bolted to the top shelf of the unit using a couple of old L-shaped brackets I had lying around (no doubt from previous IKEA purchases).

I then used one of the Mammut shelves to create a door on the front of the unit to hide the PC, speakers and other components. The door is mounted vertically, hinged on two mirror screws at the top, and secured my a magnetic latch at the bottom.

An additional shelf was added at the top to house the wireless keyboard, instruction manuals and other misc items.

The bottom shelf was intentionally left free for storage of kids toys and games.

The PC is a completely bare bones system comprising an ASRock motherboard, AMD CPU, budget power supply and an old scavenged laptop hard drive.

The speakers are a recent addition, giving a pleasing retro thump to games like R-Type Leo. A second output on the motherboard goes to an old Denon amp powering the main summerhouse speakers, so I can get the whole arcade vibe going, minus the sticky carpets.

The whole kit is finished off with a chrome power button on the left, a Pepsi bottle opener on the right and a five meter string of LEDs on the rear which can be set to just about any colour.

The stickers on the wall are from IKEA too!

~ Grant Gibson, Scotland