Tuesday, 3 July 2012

Dog obstacle from Sultan Lade


Materials: SULTAN LADE Slatted bed base, screws

Description: 1. Separate individual slats.
2. Take one slat and cut it in half.
3. Take one full-length slat, lay it on a surface and attach another slat to the left side with screws so that it forms an L.


4. Do the same on the right side.
5. Turn the construction over and repeat steps 3 and 4.
6. Take one of the half-slats and attach it to the side of the base so that it lies on a surface.
7. Do the same with the second half-slat on the other side. This is your base.
8. You can add height to the obstacle by sliding the remaining slats through the vertical parts of the base.

~ Katka, Brno, Czech Republic

Monday, 2 July 2012

G33ky Art - Old Motherboards in RIBBA


Materials: RIBBA Extra Deep Frame

Description: I had a couple of old motherboards and PC components lying around. Since they were rather colourful and I had a plain wall to decorate, I decided to have them framed.

Unwilling to have a custom frame made for them, I headed down to Ikea where I found 520 x 520mm RIBBA frames (Article Number: 601.798.01) had a picture width of 490mm, just enough room for two ATX motherboards side by side, or 4 mATX.

Because the motherboard was thicker than the maximum 30mm depth, I had to remove the IO ports to make them fit. The thinned-down motherboards were then hot glued onto the frame. A few screw holes for fastening were also added for good measure.

As the frame was now much heavier than Ikea designed it to be, I was afraid the original clips would not hold. So I drilled four more holes were and threaded a thicker wire for hanging. Hope this inspires you to give new life to those old / non-functional PC components!

See more of the motherboard art.

~ Justin Lin, Singapore

Use Boalt to hide the ugly things under the desk


Materials: Boalt CD storage, small (door) hinge, screw

Description: I have two Boalt CD storage but I started to digitize my CD collection so they became obsolete.

I always had my router, cable modem, power supply, extensions, etc. under my desk, without any order, looking really ugly and messy.

This is why I thought I could use the racks to hide all the stuff.


Fortunately a little piece was already came off of the rack so there was an exit for the cables :)

I have turned them against each other, used a small door hinge, screw them together, and that was it.

Packed all the stuff in and now I have a tidy looking working area.

~ Mark, Budapest

LEGO chest of drawers


Materials: Leksvik

Description:
My son has really TOO Much LEGOs, which he inherited from several relatives. They would not fit anywhere. SO when I saw this second-hand chest of drawers, I decided to give it a try.


There is not much work here:

1) Remove old coating with sand-paper

2) Draw lines to make it look like Lego blocks

3) Paint the "blocks" with acrylic paint

4) Attach the Lego boards

5) Put new coloured handles in.

All work took 1 hour a day max during 3-4 days.

~ Marina, Belgium

Sunday, 1 July 2012

Vika Artur TV Stand


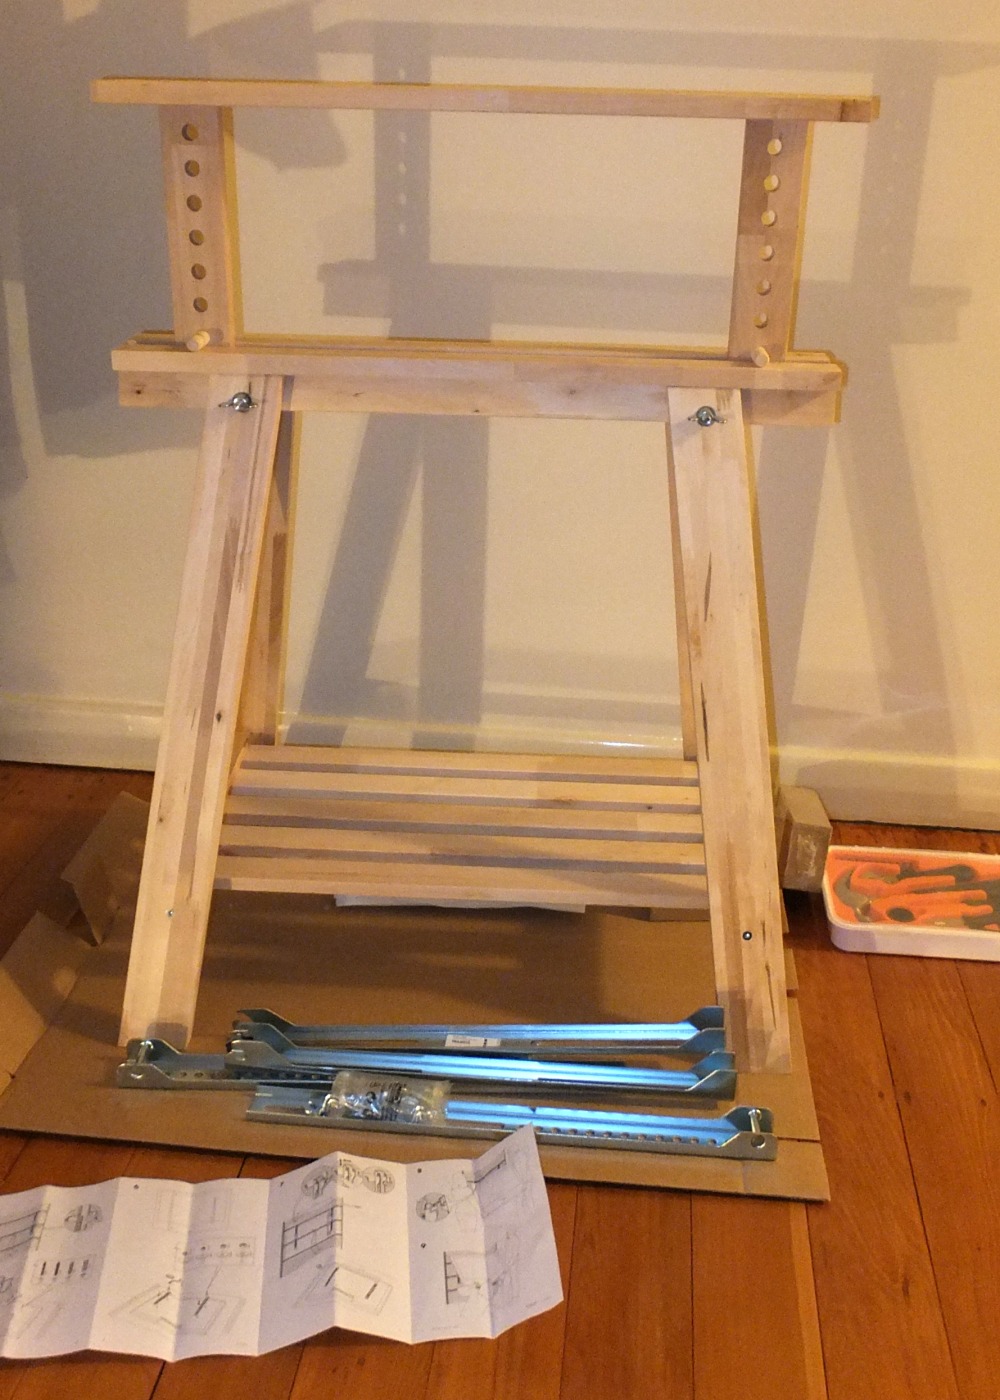
Materials: ikea Vika Artur Trestle with shelf, ikea Framsta wall bracket, ikea Betydlig wall bracket. Misc nuts & washers, threaded bar.

Description: Not being a fan of 'traditional' designs when it comes to some furniture, I was looking for something other than the normal style of wooden rectangle box, on legs, with doors approach to TV stands. Inspiration hit me in the face one day while looking at an easel in an art supplies shop, and some months later I found the parts I needed to make it happen in Ikea.

I took a Framsta TV wall bracket[s], and attached it to a Vika Artur trestle. This could be done in ten different ways.


I fixed two small Betydlig brackets to each Framsta bracket, then fixed each Framsta bracket to the stand at each of the four points with two threaded bars, some nuts, wingnuts, washers, etc. Some drilling was required at the top of the trestle. You could use four smaller screws / bolts instead, as long as it's secure. I chose the Ikea Betydlig brackets, originally intended for hanging curtain rails, only for the finished look. You could use any bracket from a hardware store or make your own. Future add-ons include a Dioder for ambient backlighting.

I had no idea if this would work or not beforehand, because I was guessing with most of it. As it turned out, it suited my TV perfectly. This mod surely won't be suitable for all TV types, especially bigger or heavier ones. My TV is a 42", about 13kg sans stand, and 1.5 inches at it's widest spot, inconveniently at the very bottom. Both brackets are fixed at 400mm apart on this TV, meaning they come down over the legs. Since the trestle legs jut out, it's important to measure up everything and take out as much guess work as possible. The Betydlig brackets come with rubber pads that were conveniently big enough to use as a spacer between the Framsta bracket and the trestle, keeping the Framsta bracket out just enough that it doesn't touch the legs, keeping it vertical.

~ Anthony, Adelaide

Dual Expedit Wine Storage


Materials: 4x4 and 2x4 Expedit Bookshelves

Description: I was inspired to try my hand at turning an Expedit into wine storage after seeing a couple of other projects on this site. I got two Expedits from the as-is section, then sanded/primed/painted them black.

The tedious part of this project is making the shelves. Keep in mind the cube openings are 13" square on the front, but are 14" deep.

For the "X" crosses, I cut two pieces to 17.25" by 14", then cut a notch in the center that went halfway through with a jigsaw.

For the Tic-Tac-Toe style inserts, I used the same approach of interlocking pieces. Each insert requires 4 pieces cut to 13" by 14". Cut notches equal to the thickness of the wood (in my case .75") at 1/3 and 2/3 of the way along a 13" side. The pieces should look like a thick "M".

At the scale of my shelf you'd need 8 grid inserts times 4 pieces (32 pieces) plus 8 larger pieces for the "X" inserts.

I was lucky enough to get to a Home Depot when they weren't busy at all, and I got a couple large sheets of wood cut to size without them charging me per cut.

As you can tell, some of my cuts didn't yield perfectly even grids, and I may go back and fix this in the future.

Adding a lamp and some stemware holders for glasses finished it off.

~ Tim Wesley, Boston, MA

Man Cave Table Hack


Materials: Dalfred stool, used dart board, 1" hole saw (I think it ws 1"), screwdriver

Description: My friends and I play darts at least once a week...and after about 6-9 months of playing, the board needs replacing because of all the abuse they take. Instead of throwing them away, I've found spots throughout my bar at home to store them... but since I was running out of space, I decided to do something about it.

One a recent trip to Ikea, I came across a Dalfred stool that looked pretty cool... and thought that it would make a great base to fashion a table out of one of the boards.

I put together the stool per the instructions, until it came time to mount the top of the stool (the part you sit on) to the metal bracket that attaches it to the spinning center shaft. Taking a 1" hole saw (I think it was a 1"), I carefully drilled a hole almost all the way through the dart board from the back in the center, until the metal mounting plate sat flush. 5 screws were used to mount the plate to the board (just used the ones that came with the stool), and then the bracket just popped onto the spindle...

Now that my friends have seen this table, they're all wanting one for their game rooms at home! The few things I like best about this table is that it goes with my bar room motif, it's a great little table that can be easily moved to where it's needed (and height adjusted if need be)...and the darts have a place to stick around while we're inbetween games/shots.

One thing I didn't mention was that I removed the metal grid work that defines all the separate scoring areas. I only did it because the grid was coming up in a few spots...but I think it looks good without it being that it's a table. Plus...there was a chance that leaving it in would result in a spilled beer...and we just couldn't let that happen.

~ Thomas, Ohio