Thursday, 5 July 2012
Double-deck Rast
Materials: 2 x Rast, 4 x F�GLEBODA Handles, 1 x F�GLAVIK Handle, other Hanles, Screws, Paint, Saw, e wooden board/shelf
Description: I had one Rast, the outer part painted in white with silver F�GLEBODA Handles on the drawers. This was nice, but not nice enough so I decided to buy another Rast, getting more colors and replace a drawer with a shelf.
I started by painting one drawer front in red and used some handles I had for a long time. They are similar to the ones that came with the Rast but a little bit bigger, darker and more used looking.
As you can see on the pictures, I cut 2 drawer fronts in 2 parts and just put them together on the inside with a small plate and some screws. So when you look at the Rast it seems as if are two drawers but it's still just one.
I painted them and used some different handles.
Then I placed one Rast on top of the other and for that it's more stable I drilled some holes and used the small parts you normally use for shelves (in billy for example) - I don't know how they're called but you can see them on one pic.
What else? Oh yes, I didn't fix the small board on the bottom of the upper Rast and I replaced a drawer with a shelf.
Guess that's all...
~ Sabine, Basel, Switzerland
Wednesday, 4 July 2012
Solid oak desk for a designer
Materials: VIKA ANNEFORS, two VIKA ADILS table legs, NUMER�R kitchen countertop, sized at 126cm x 62cm.
Description: I just put up a blog on our website, about a desk that we hacked from Ikea parts. We�ve got a new employee starting with us soon, so I had to get another desk in.
See step by step instructions for the solid oak countertop workstation.
~ Kishen
Lack Bottlecap Table
Materials: LACK sidetable
Description: With a couple years of college bottlecap collecting, some super glue, and resin, my boring black table turned into a high-gloss bottlecap decor.
I followed this instructable.
~ Sara Kowatch, Cincinnati, OH
Duktig Kitchen Goes from Bland to Bling
Materials: Apa storage box, Tag handles, Duktig mini-kitchen
Description: My boyfriend's sister and I wanted to give her 2-year-old daughter the Duktig mini-kitchen as a birthday gift, but we were unimpressed by a few things:
1) It's boring. Adults might like the minimalist, white and natural wood look, but no little kid is getting psyched over that.
2) No fridge. Where do you store all your play food?
3) The oven has a shelf in it instead of an oven rack. Not very realistic.
We fixed these issues pretty simply, basically by painting the hell out of it. As for the missing fridge, we used an Apa storage box on its side, spray painted metallic silver on the outside and painted white on the inside. We attached hinges to keep the door on, and used Tag handles in two different sizes to act as freezer and fridge handles. I used my Cameo cutting machine to design and cut out a Frigidaire-style label with her name on it for the front of the fridge, just to make it that more awesome. The stove situation was solved by painting the shelf grey and drawing a grid on it with a Sharpie.
My niece loved the finished product and it was definitely the highlight of her birthday.
~ Adrienne, New Hampshire
Over Sofa Table
To friends and readers in the US, happy happy July 4th! ~ Jules
Materials: Fabian / Lack / Ekby / Assorted Screws / Stain
Description: Underwhelmed by the selection of over sofa tables on the market, especially for the price. (Including Ikea's Stockholm table.) Opted to hack my own! Two Fabian wall shelves. Four Ekby Stodis brackets. One Lack wall shelf.
Placed the two Fabians perpendicular and braced with two of the supplied metal Fabian brackets. Attached two Ekby brackets for increased stability. Attached two more Ekby brackets to the Lack top.
Then attached Ekby / Lack piece to the Fabian shelf. Voila! A new over sofa table that cost around $25.00.
One tip: choose screw sizes carefully lest you screw through the Fabian shelves. After assembly, we stained the table. In retrospect, we should have stained before assembly but we first wanted to see if this even worked. Presumably, this hack can be altered style and color wise to meet your own tastes. Enjoy!
~ Michael Beatrice, Los Angeles, CA
Materials: Fabian / Lack / Ekby / Assorted Screws / Stain
Description: Underwhelmed by the selection of over sofa tables on the market, especially for the price. (Including Ikea's Stockholm table.) Opted to hack my own! Two Fabian wall shelves. Four Ekby Stodis brackets. One Lack wall shelf.
Placed the two Fabians perpendicular and braced with two of the supplied metal Fabian brackets. Attached two Ekby brackets for increased stability. Attached two more Ekby brackets to the Lack top.
Then attached Ekby / Lack piece to the Fabian shelf. Voila! A new over sofa table that cost around $25.00.
One tip: choose screw sizes carefully lest you screw through the Fabian shelves. After assembly, we stained the table. In retrospect, we should have stained before assembly but we first wanted to see if this even worked. Presumably, this hack can be altered style and color wise to meet your own tastes. Enjoy!
~ Michael Beatrice, Los Angeles, CA
Tuesday, 3 July 2012
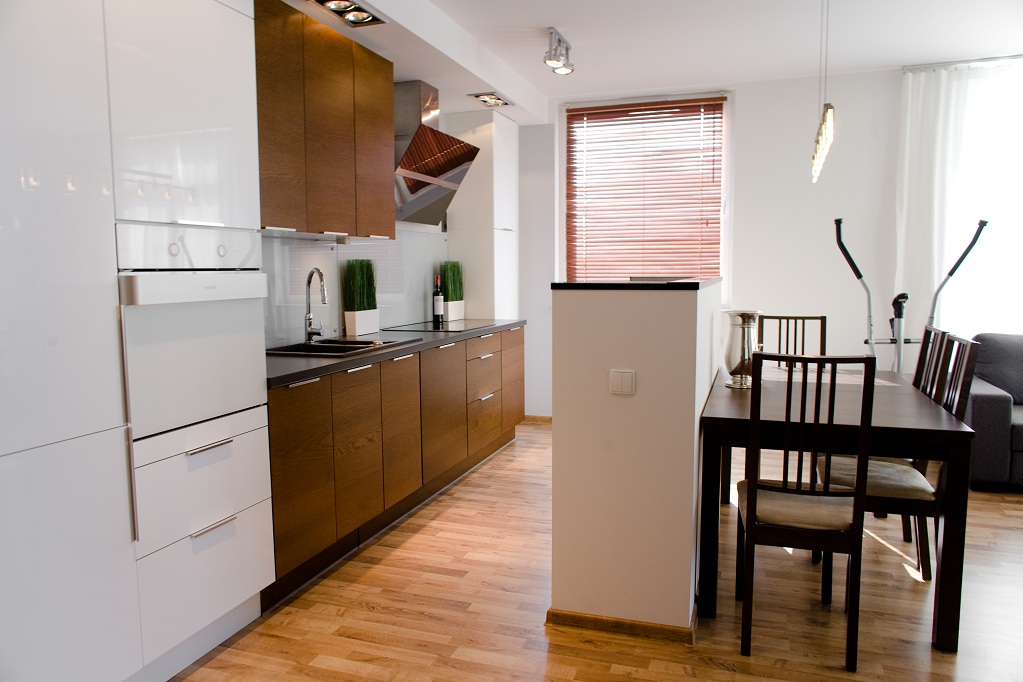
RTV unit from kitchen and bathroom cabinets
Materials: Kitchen and bathroom Ikea cabinets
Description: This was an open space kitchen/living area. We wanted to keep things simple and uniform. After selecting Nexus and Abstract fronts for the kitchen we came up with an idea of using the same for the nearby entertainment unit.
What we used were kitchen cabinets 40x92 cm (Nexus fronts) covered (as in the kitchen) with Pragel counter top and white glossy tall Godmorgon cabinets, to match glossy white Abstrakt fronts in the kitchen. Also in the kitchen we used top cabinets to create a narrow island, but that's another story :)
~ Diana Holod, Poland
Baby Changing Table and Dresser
Materials: Velcro Tape, Peel and Stick Wallpaper, Sniglar Changing Table, Brimnes Chest of 3 Drawers, Driller & Screws
Description: After a futile search for a reasonably priced nappy changer/chest of drawers I decided to make my own first IKEA hack. Here it goes.
First I assembled the chest of drawers according to Ikea's instructions.
Then I covered the Sniglar's top shelf with peel and stick wallpaper (just because it did not match the decor), assembled it and added screws for support.
Finished the changer by sticking the Sniglar shelf to Brimnes top with adhesive Velcro so it won't slide off.
~ Lyn, Dubai
Subscribe to:
Posts (Atom)