Showing posts with label Abstrakt. Show all posts

Friday, 20 July 2012

Sideboard from Glass Cupboards in Brilliant White


Materials: Brilliant White Abstrakt 8'x3' Finishing Panel & Pax Wardrobe Door, 3 old Ikea pine office cupboards, 8 Capita Legs

Description: I'm sure you could do this hack with any old cupboards. The inspiration came after completing the finishing panels in our kitchen (and learning from that experience) and we have some old Ikea pine wall cabinets that we just weren't ready to part with, but were not in keeping with the renovations in our house.

We have an open concept kitchen/dining area, and hey presto, using the same finishing panels as we have for the kitchen doors, the transition is beautiful and seamless. The nice thing about using the high cupboards, for a sideboard is that they are nice and narrow, but deep enough for large kitchen plates. I like the glass doors to show the beautiful crockery and glassware.

As to HOW we made it:

In the "As-Is" section of Ikea, we found 1 Ultrabrilliant white 8'x3' finishing panel from a kitchen (50% off - $90) and 1 Pax Wardrobe door, same finish, same thickness, also 50% off ($50).

Using a circular saw cut the finishing panel in half to fit your cupboards, keeping the good edges towards the front. The wardrobe door was cut for the side pieces.

NOTE: When cutting, keep the side that will be "rough" face up . The finish will look bad, but don't worry, you'll place that side against the cupboards and it won't show.

Follow Ikea's standard kitchen installation instructions for:

1) Screwing cupboards together (we used their kitchen cabinet screws too)
2) Attaching finishing pieces - except you won't have pre-drilled holes, so you'll have to make your own.
Add a depth guide to your drill bit so you don't drill through the panels!

Add the legs of your choice. We used 8" Capita legs.

This was completed in one evening, since the cupboards were already made (over 5 years ago)! We actually gutted our house and have been slowly rebuilding it. If you're interested to see more about our "just two weeks" (think The Money Pit movie - cough - five year) renovation project of a 100-year old triplex in Montreal, click here.

~ Joanna and Marc, Montreal

Tuesday, 3 July 2012

RTV unit from kitchen and bathroom cabinets


Materials: Kitchen and bathroom Ikea cabinets

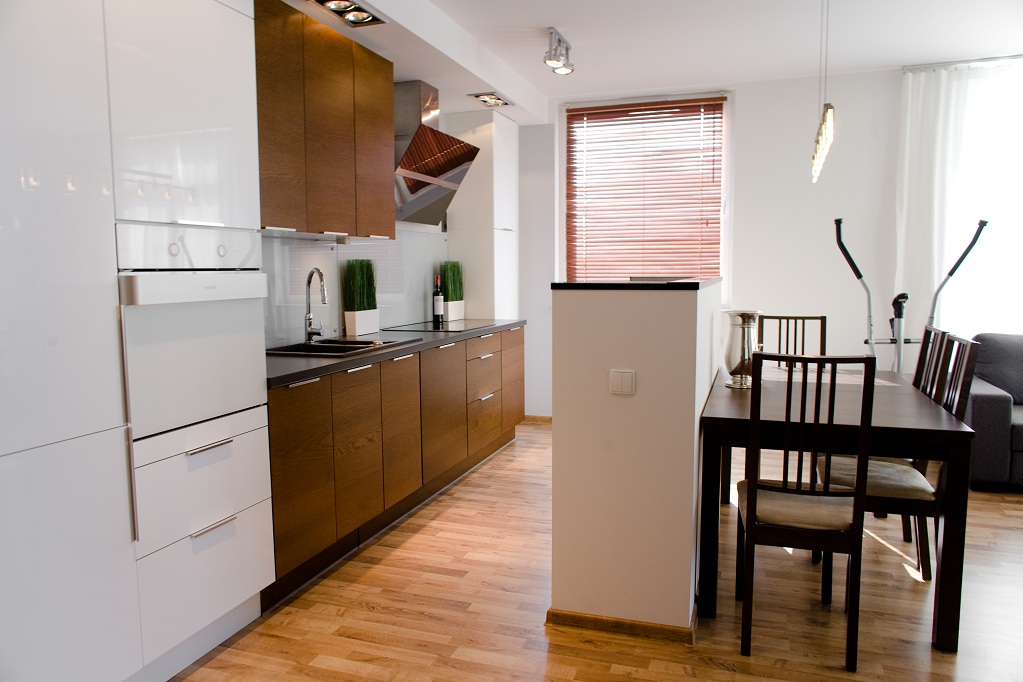
Description: This was an open space kitchen/living area. We wanted to keep things simple and uniform. After selecting Nexus and Abstract fronts for the kitchen we came up with an idea of using the same for the nearby entertainment unit.


What we used were kitchen cabinets 40x92 cm (Nexus fronts) covered (as in the kitchen) with Pragel counter top and white glossy tall Godmorgon cabinets, to match glossy white Abstrakt fronts in the kitchen. Also in the kitchen we used top cabinets to create a narrow island, but that's another story :)

~ Diana Holod, Poland

Thursday, 10 May 2012

Biginfrikinhevi: Red and black home studio desk


Materials: Parts listed below, Tools: junior hacksaw, screwdriver, uber-weak drill, dremel (stronger than the drill)

Description:
Ikea Parts:
Desktop: Besta Tofta door - Gloss Black 60cm x 192cm (As-Is)
Frame: Galant desk frame 60cm x 160m
Legs: Galant A-leg
Drawer Base: Besta Tofta door - Gloss Red 60cm x 128cm
Drawer sides: Abstrakt drawer front - Gloss Red 60cm x 13cm (As-Is)
Cable management: Galant cable management 135cm x 12 cm
Computer base: Akurum wall cabinet door 30cm x 76cm - White (As-Is)
Speaker stand tops: Lantliv plant stands
Backlight: Dioder 4-piece light strip - white

Other Parts:
L-brackets, 22" drawer slides - Home Depot
Speaker stands: old Atlantic stands I had kicking around
Wire corner rack - Canadian Tire

------

After finding the Gloss black door in the "As-Is" I figured that it would make a cheap desktop at only $30... then I added a new frame and legs... then more... Gah!


I started by assembling the Galant frame as per instructions and centering the black Besta door on top.

Needing a cable management system, I returned to Ikea and picked one up. Because the cable tray was too wide to put on normally, I had to straddle the frame and put it on backwards. This turned out for the better since it completely hides all the cables from the front and flushed with the back of the desk.

I assembled my computer and found that the speakers were definitely too low, the monitor; also too low, the keyboard; too high, and overall it was rather shallow at 60cm deep. Not liking Ikea's rather flimsy attempt, I sought a better keyboard drawer.

Searching through Google images, I stumbled upon a studio setup that was completely hand-made and had a secondary desk that rolled out from underneath. It held a regular keyboard and mouse as well as a full controller keyboard. I fell in love with the size... but didn't like the secondary desk idea.

Still stuck on the drawer format and looking for a full size desk solution, I took a few measurements and POW, it struck me! I'd seen a couple of drawer fronts at the "As-Is" area that I figured were the same depth as the desk... figuring them to be about 2cm thick and a drawer slide to be about 15mm, I did the math and found that I had *almost* 128cm remaining between the frame edges on the bottom of the desk. Nice! I remember seeing 128cm in the Besta door sizes!

A quick visit to Home depot to pick up the largest drawer slides (22") they carried and various L-brackets, then off to Ikea again. The slides were exactly the size I thought they would be and the two drawer fronts were slightly thinner at 18cm. This left the needed 128cm: the exact described width of the Besta door. Since the drawer fronts were red/brushed chrome and I already had a black/white/red/chrome theme going in my apartment, the gloss red Besta seemed like the only rational choice.

After getting home and laying everything out on the upside-down desk, I realized that I would have to work around the frame and the cable management tray. A few cuts (and beers) later, I was able to secure the drawer fronts snugly into the frame, covering the ends of the cable tray.

I had to place the slides slightly lower than planned so that the drawer bottom cleared the cable tray. This left the bottom perfectly flush with the sides and allows the drawer to close completely flush with the front when I need to move.

Having not measured the height of my controller keyboard and also having fully assembled the desk, I had a moment of panic when I placed it on the drawer and realized that I may not be able to slide it in! Luckily, there was clearance... but <2mm!

Dioder lights: I used the supplied foam tape tabs and mounted them to the back of my monitor.

As for the speaker stands: I just center-mounted the caster-less Lantliv stands on top of my existing stands so that I could avoid putting holes in the bottom of my speakers. This allowed me to put them exactly at ear height. Being behind my desk, I have no fear of tipping them.

Done! (now.. the cable management!)

~ HeavenIsDigital

Saturday, 17 March 2012

Box Office multimedia workstation


Materials: FAKTUM, ABSTRAKT, RATIONELL

Description:
The top portion:
- 1 Seater with office desk
Storage compartments - 2 CDs and records
- 1 Space for two to three 20" LCD screens.
- 2 Storage drawers PC laptop and other things
- 1 90cm LED light wand

The bottom portion:
3 doors with sliding shelf for A3 multifunction printer
- 1 Space for CPU with storage space for cables
- 2 drawers
- 6 wheels


Designing an office workstation in clean design and FAKTUM ABSTRAKT gloss white lacquer.

Taking the appearance of a buffet lounge, the Box Office work station integrates easily into space and allows a solution of aesthetic and functional storage space for computer equipment.

Its dimensions can accommodate any professional computing environment (central unit, A3 Multifunction Printer, 2 to 3 LCD screens, laptop storage, CDs, records, papers etc. ..) to work in optimal conditions.

It can be used in the office or at home for its multitude of storage and its intuitive ergonomics to organize everyday accessories. A slight pressure is sufficient to open the doors and drawers. The cable passes are provided at the rear of the cabinet to let the electrical cables of different devices. By its minimalist design and an elegant box, the BOX OFFICE workstation can hide the workspace when it is closed.


See more of the box office workstation. (in French)

~ MONOKROM-Architectes, PARIS

Monday, 12 March 2012

Kitchen with a twist

Kitchen with a twist

Materials: Abstrakt cabinets with high gloss gray/white door fronts and drawers, Abstrakt refrigerator/fan cabinets, Nutid oven / microwave (30 inch) Besta Burs media storage unit, Numerar counter top (black with steel look edging) Numerar birch conuter top, quarter inch iron brackets (made at local foundry), Medium Foto pendant lamp over table,

Description: Our inherited kitchen was old, badly planned and left me with little inspiration to cook!

After looking at numerous styles, designs and crazy prices, I came up with a design which catered for all of the family needs and budget.

Welcome to Form meets Function and the savvy use of Ikea above Fridge Freezer Cabinets and Besta storage unit.

After the removal of the existing kitchen and the re-positioning of a door way, we were good to go.


Kitchen with a twist

We built a studded and drywall frame to house the 30 x 80 oven/microwave cabinet, the fridge/freezer and a 24 x 80 pantry. To make the poorly designed oven cabinet fit we had to cut down several of the drawer fronts. Several trips to Ikea were fruitless so we had to improvise.

The kitchen island was made using the standard double sink unit, the dishwasher and two drawer units on either end. An Ikea Numerar birch wooden counter top was cut down to make the side pieces with a high gloss white cabinet end piece used for the back. We cut down more wooden worktop to make the breakfast bar.

The most unusual part of the kitchen was the use of six over refrigerator/fan cabinets. We put three of the 30 inch units on the floor topped with a cut down counter top. We then stacked another cabinet on the end unit with two more "floating". This was done by using thick iron brackets screwed into studs to take the weight.A straight iron bar was put underneath to spread the load. On top of the middle unit we put an induction cooker top with extractor fan above a stainless steel backsplash.

We used a a Besta Burs media storage unit on a wall of slate. This storage unit holds glasses and mugs. The slate wall as well as being a design feature absorbs the mid day heat to add natural warmth to the kitchen.

The lighting on the ceiling was replaced using the existing fittings with a mixture of Ikea lighting and lights from another big box store.

To frame the large chalkboard we used the left over birch counter top.

~ Sharron Matthewman, Alberta , Canada

Wednesday, 7 March 2012

Anders ABSTRAKT splash guard


Materials: ABSTRAKT Glossy door, Saw, Glue, Silicone

Description: When remodeling my studio apartment I wanted to make the kitchen part integrate with the rest of the room. Since I used the ABSTRAKT doors on all cabinets and wardrobes in the apartment I figured I could put one horizontally on the wall over the countertop as a splash guard.


1. Cut the side of the door to make it fit over the counter top.
2. Glue it to the wall with PL400
3. Fill the crack between the splash guard and the countertop with silicone.
4. Done!

This was a really cheap alternative to tiles.

~ Anders W, Stockholm, Sweden

Wednesday, 12 October 2011

Ikea Floating Headboard from Kitchen cover panels


Materials: Perfekt Abstrakt High gloss grey panels, wood framing

Description: I made this headboard from Ikea's high gloss kitchen panels. The panels come in 24x80" so I used 2 horizontally with one above the other so as to not have to cut and re-edgeband them. I ripped four 1" thick and 30" long vertical strips from 2x4's to connect the 2 panels together and spaced them evenly along the back.

I then ripped longways two 2x4's with my table saw blade on a 30 degree angle and trimmed them to 60" long. I mounted one half of each 2x4 to the wall and the other half on the top and bottom backside of the headboard. This lets you 'hang' the headboard on the wall, and the diagonal cut will seat the headboard so it can't come off the wall easily.


Lastly , I trimmed the top, bottom and left sides with another 24x80 panel scribing it to the wall to eliminate gaps and irregularities of the wall. Just a typical day's project as an installer here at Modernash Furniture Supply. More custom projects we've done to follow

~ Brent Burgee, Nashville, TN

Tuesday, 20 April 2010

Akurum cat cabinets


Materials: Akurum 21" base cabinets w/ drawers, Abstrakt doors, Svep handles

Description: My wife and I have been wanting to hack Ikea for a long time, in an effort to wrangle our cats' litter and food (not only to keep the house cleaner, but also to keep our dog from grabbing late-night litter snacks). Knowing that cats can get picky when it comes to where they do their business, I wanted to make sure that they wouldn't have any less room to use the box than they had previously with their covered litter pans.


After constructing two Akurum base cabinets (making sure they were wide enough to accommodate our largest litter pan), I used the jigsaw to cut a 7" x 9" hole out of each one. Originally I was going to make the holes on the outer-facing sides of the cabinets. However, I was fortunate to stumble upon an "as-is" countertop at Ikea for $30. Aligning the cabinets to the edges of the countertop allowed me to make the portholes on the interior sides; this way I don't have to worry about what other furniture surrounds them and the portholes are always accessible.


As a bonus, I picked up a spice rack (Rationell Variela) that fits perfectly inside the cabinet; it's the new cat food trough!

~ Steve