Wednesday, 29 February 2012
Laser Clock with salad bowl
Materials: 300.814.67 BLANDA BLANK
Description: Clock with
Arduino
Laser
Servo motors
Blanda Blank Bowl
The laser beam on the left shows the hours, right for minutes. In the manner of a sundial. Rays move according to time. Stickers with the numbers, hour & minute were added to wall.
See more of the salad bowl laser clock. (Translated to English)
~ Zouliv, France
Dolly Lampshade Cover
Materials: Skimra
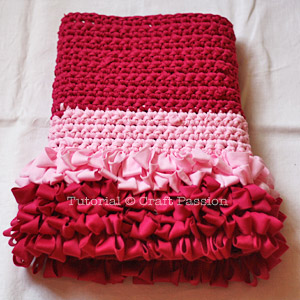
Description: I crochet a lampshade cover for the SKIMRA I bought at Ikea many years ago. See how it brightens up a room after putting on a new dress?
1.Measure the Skimra lampshade's dimension.
2. Make a crochet swatch of 4" x 4" with the yarn or fabric strips of your choice. Count the numbers of stitches and rows of the swatch.
3. Do some maths to get the total numbers of stitches and rows based on the measurement you took on the lampshade.
4. Come with a crochet pattern including reducing stitches so that the crochet cover can follow the lampshade's shape.
5. Crochet the cover with loop-stitch and single-crochet stitch.
6. Put the cover on.
See the crochet lamp shade tutorial.
~ Joanne.L
Bonsai from Fejka-plants
Materials: Two Fejka plants
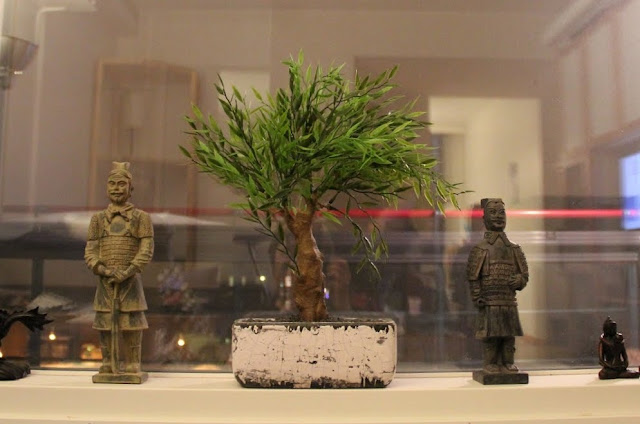
Description: I took one Ikea Fejka-plant to use as the tree trunk of the bonsai, and leaves from an another Ikea Fejka plant. I bent the branches some and set it into a different pot. I used hotglue to attach the branches with leaves, and some dark gravel to fill the pot.
~ Satu Tarsaranta, Tampere, Finland
Rest my jewelry
Materials: Sultan Lur�y, Grundtal - S hook
Description: Remove one plank (easy to do without tools, just pull. Then hang it on the door. Place the hooks where ever you like, and I placed in my case jewelry, but can imagine that other things, like bags, skarfs, etc. also looks cool on it! Simple, practical and nice to see! At last, but not least: remove the sticker.
~ Henri�tte v. Steeg, Ermelo, Netherlands
Expedit into active stereo speakers
Materials: Expedit, misc. shelves, mini amplifier, misc. speaker units
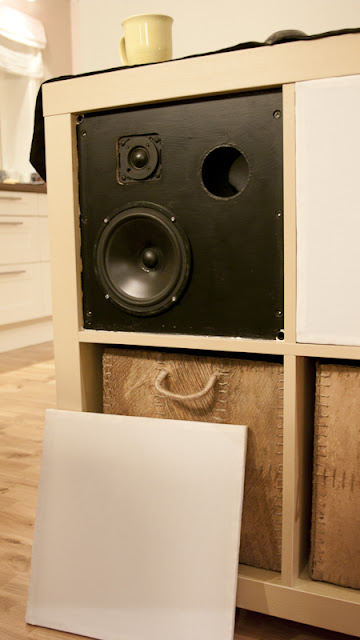
Description: I wanted to get a very discrete stereo system in our dining area. I have a Logitech Squeezebox radio that I wanted to use as source, but the small speaker in it doesn't go a long way.. At first I thought of connecting a pair of PC speakers and hide them inside the Expedit, but I really wanted to get a full and deep sound that I wouldn't get from most PC speakers or iPod docking stations etc.
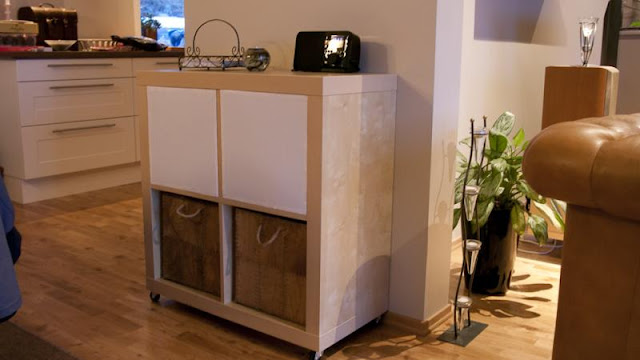
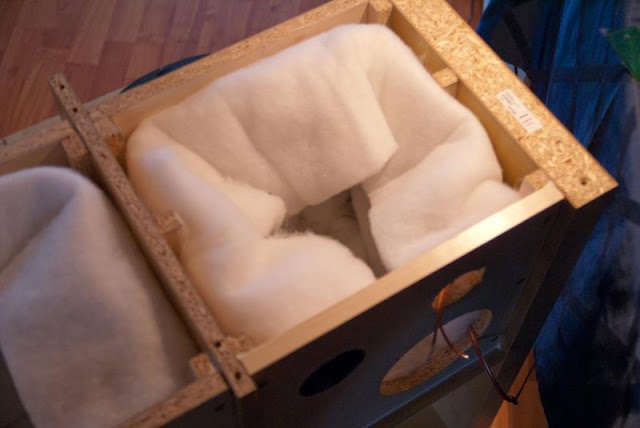
Then I got the idea to make the Expedit itself into a speaker.
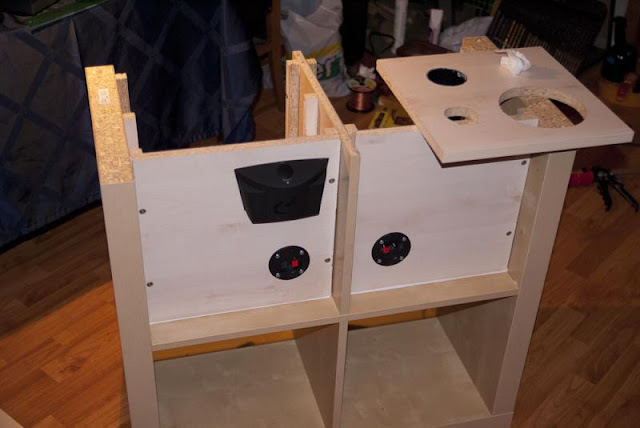
I used various shelf plates and dividers (including some IKEA's) that I had lying around to make the front and rear baffles as well as for bracing and side wall stiffeners. I installed some old speakers that I used for my car hi-fi back in the days - Boston Acoustics tweeters and Vifa bass/mid 6,5" units. For amplification I used a cheap but surprisingly good Dayton Class T desktop amplifier, hidden away on the rear panel. The bass ports and crossovers were properly measured and tuned to get the most out of the system, and of course a good amount of acoustic damping material.
The fronts covers are cut out of ply, painted white and covered with speaker cloth. Snap-in fasteners.
The amplifier has a standard line input jack allowing the Expedit to be driven by any kind of source - an Internet radio, iPod, bluetooth receiver, you name it.
~ Affi, Strand, Norway
Tuesday, 28 February 2012
A Zen Inspired Wall Hanging Hides the Ugly
Materials: Ikea ANNO AMORF and Ikea ANNO STRA
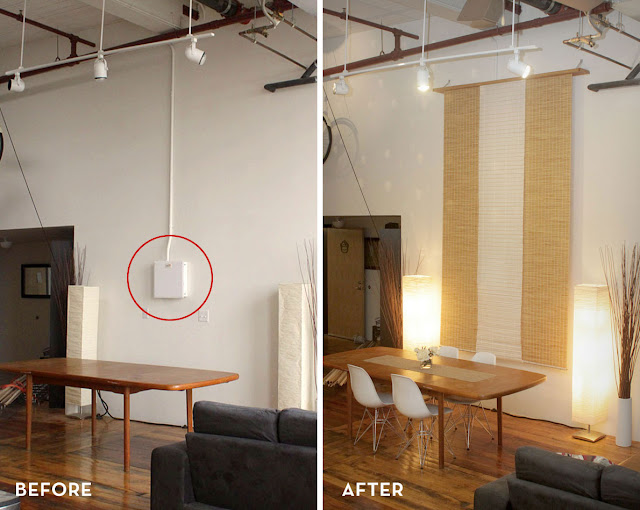
Description: We moved into an amazing work/live loft a few months ago, and we just about love everything about this place. Except one thing. The ugly white internet box smack dab in the middle of our living space with conduit going all the way up to the ceiling. Being renters, we couldn't do anything to move it.
It was such an eyesore that we started to brainstorm ways to hide it, while keeping the box and light switches accessible. Covering it with artwork just wasn't functional, and not much could be done to hide the pipe going up to the ceiling. We finally decided on hanging a single large piece of fabric, but weren't in love with the idea of a graphic print for our space.
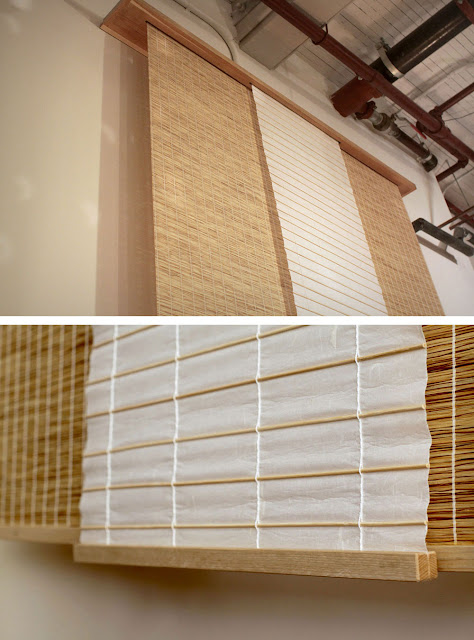
While we were searching for options, we came across these panels at Ikea that really spoke to our love of natural materials. Not to mention that each panel came at a very long length (they're meant to be cut to your window size) and they were only $9.99/ea. Score!
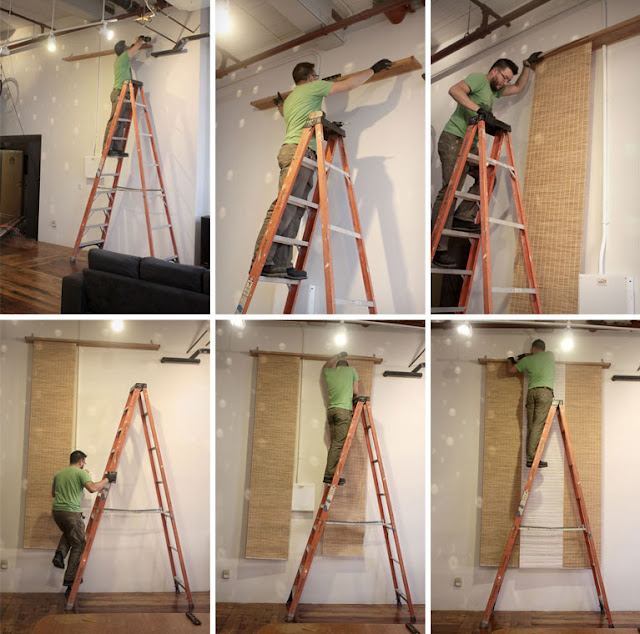
It also turned out that having three separate panels was more useful than just one, so that we could access the light switch in the back. The middle blind comes forward about an inch, just enough to give the piece some depth, while hiding the internet box underneath. We intentionally hung up the white panel backwards, so that the wood ribs would show on the front and echo the tan color on the straw panels. To finish off the panels, I cut up thin rods of Hickory leftover from another project, and sandwiched the panels in between.
We didn't like the cheap-o aluminum curtain rods that usually go with these panels, so we made our own from a nice piece of Alder wood. A 1.5" tall trim of Hickory around the main board added to the visual heft of the shelf. The contrasting border also gave the board a nice finished look. I bent some aluminum bar stock to create mounting brackets for the shelf. They're incredibly strong, and the shelf felt completely immobile after installation.
Installing each panel was as easy as threading it through a slot and stapling it to the top of the shelf. The only challenging part about the installation was getting everything perfectly vertical. Tiny adjustments at the top would skew the length left or right several degrees.
The entire piece came out HUGE - it measures about 10ft tall and 6.5ft wide.
See more of the wall hanging.
~ Paula Chang, Oakland, CA
Paper Pendant Lights
Materials: Orgel Pendant Lamp Shade
Description: Purchased track lighting rail from Lowe's and made a custom electrical splice in box that connects cord to 110V rail. I dropped the Hemma cord down and used twist tie to adjust length to create a custom lighting set over dining room table. Used with dimmer switch, the lights dim down to create a intimate dinner setting. The table can be adjusted to seat 4 or lengthened to seat 10. Table was also purchased at Ikea.
ORGEL
Pendant lamp shade, natural
$8.00
Article Number: 600.212.74
Shade of handmade paper; each shade is unique
HEMMA
Cord set, white
$3.99
Article Number: 101.758.10
Read more
In compliance with California Title 20 regulations, product prices and features may vary in the state of California. Please see your local store for details
BJURSTA
Dining table, brown-black
$299.00
The price reflects selected options
Article Number: 701.162.62
Extendable dining table with 2 extra leaves seats 6-10; makes it possible to adjust the table size according to need.
~ Mike, Mt. Lookout (Cincinnati, Ohio)
Sofa Fleece Blanket Bin and Magazine Storage
Materials: VIKA ANNEFORS x2, White Emulsion Paint, Glue (Double-sided Adhesive Tape or Instant Grab Adhesive)
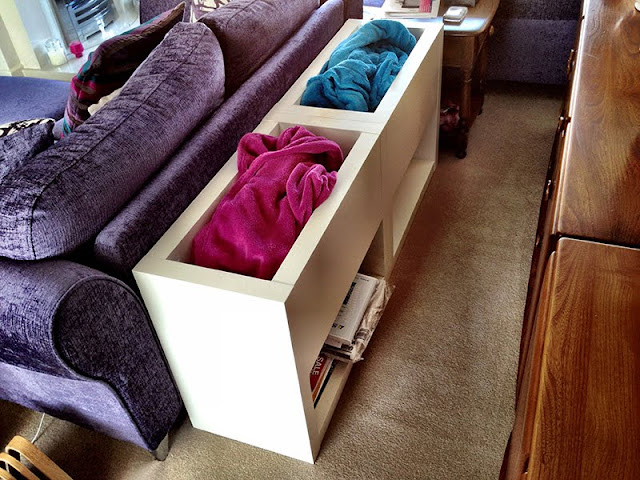
Description: We needed somewhere to store our sofa's fleece blankets and my wife's collection of magazines and newspapers. We already had a white BESTA JAGRA TV Bench so I wanted a similar looking piece of furniture to put behind the sofa. Upon visiting our local IKEA store I spotted the VIKA ANNEFORS.
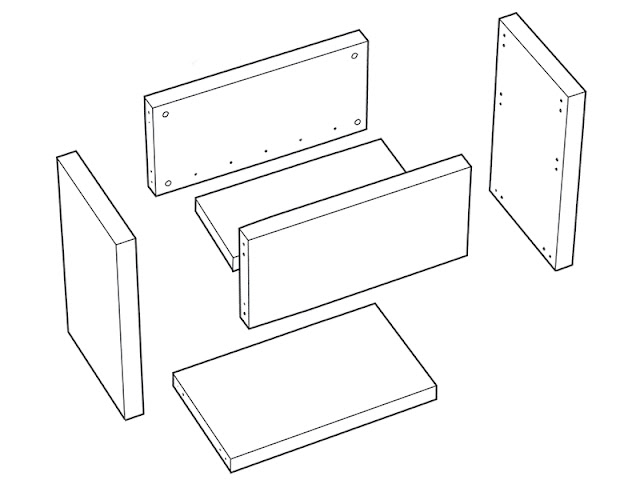
Basically, you turn the VIKA ANNEFORS on its side. If you follow the diagram, you'll notice the panels are reorientated to hide the shelf support holes. Two of the under surfaces are bare MDF and once the unit is on its side one of these will be visible, so you have to paint it white before assembly. I used white emulsion paint. The other surface isn't seen because it is butted up against the second unit. The shelf is glued into position with double-sided tape (or an adhesive of your own choosing).
We're pretty pleased with the result and the living room looks a lot tidier for it.
~ Malx, Fareham, Hampshire, England
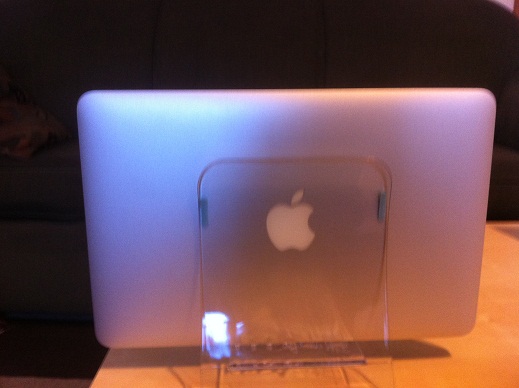
Macbook Air Desktop Stand
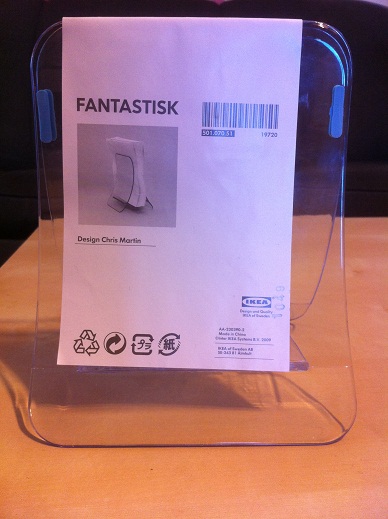
Materials: IKEA FANTASTISK napkin holder
Description: When at work and at home I use my Macbook air with an external monitor mouse and keyboard. What I really wanted was a BookArc from Twelve South but I would need to get two of them and at $39 a piece I figured I could come up with something.
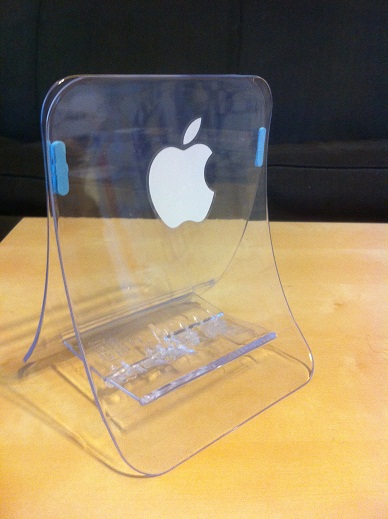
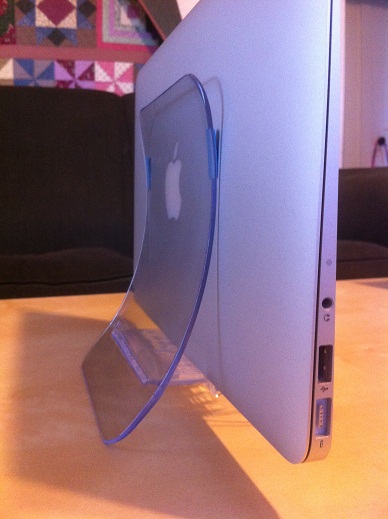
I thought of trying to make something similar out of wood etc. but wandering through IKEA I spotted the Fantastisk napkin holder and figured it would work and at a cost of under $2 it certainly fit the budget. I added the Apple sticker of course and added 4 small pieces of adhesive backed foam.
I will replace them in the next couple of days with those clear stick on feet that the hardware store sells. That should look a little better then the foam. The end result is a professional looking hack that lets me use my macbook air as a desktop computer that takes up very little room on my desk, and allows access to all of the ports on the computer.
~ Chad Parrish, Henderson, MN
Photography Light Box
Materials: SKUBB laundry hampers x 2
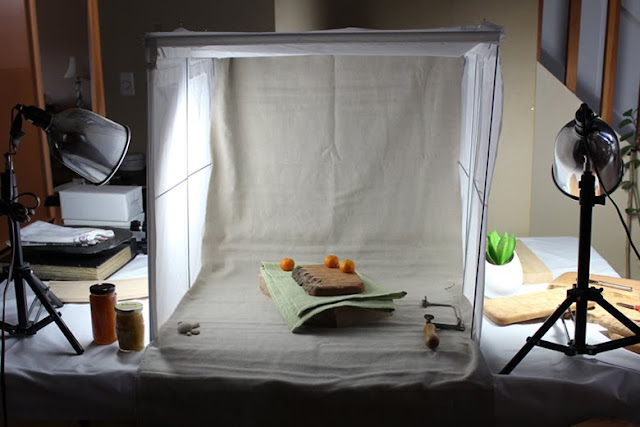
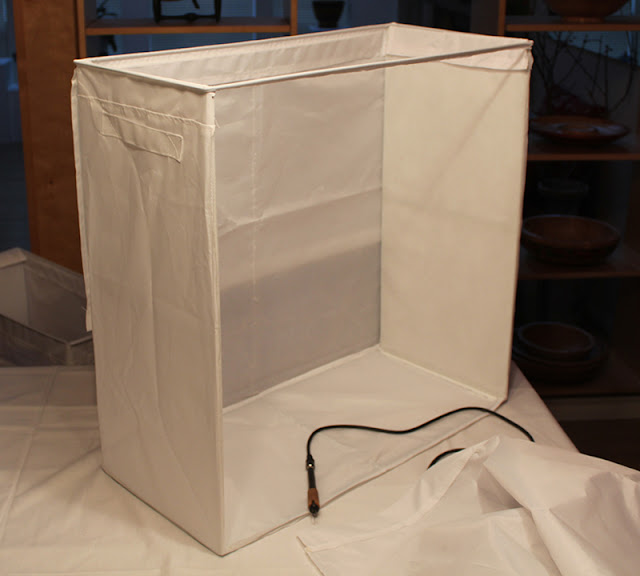
Description: 2 white laundry hampers were used to create a large photo light box.
Place the hampers together so that the lids will be facing towards each other. The hamper nearest you will be the front hamper.
1. Cut the material from the front and back panel of front hamper.
2. Cut the material from the front of the back hamper.
3. Cut the material from the inside wire frames to allow more light through the sides and use office clips to hold up the wire frames.
4. Place the front hamper and back hamper together using clear packaging tape to join the seam.
5. Bring the lids towards each other and fold down and clip in place using large office clips.
Backdrop ideas: Cut a roll from a roller blind as your backdrop or use fabric, wallpaper or paper.
2 Hampers were purchased at a sale price of $8.99 ea (reg 12.99 each). Office clips, approx. $5. Total cost $25.
~ Shirley Campbell, Coquitlam, BC
Monday, 27 February 2012
Stapler art on LACK table
Materials: LACK table, STROMBY frame, glue, rubber eraser
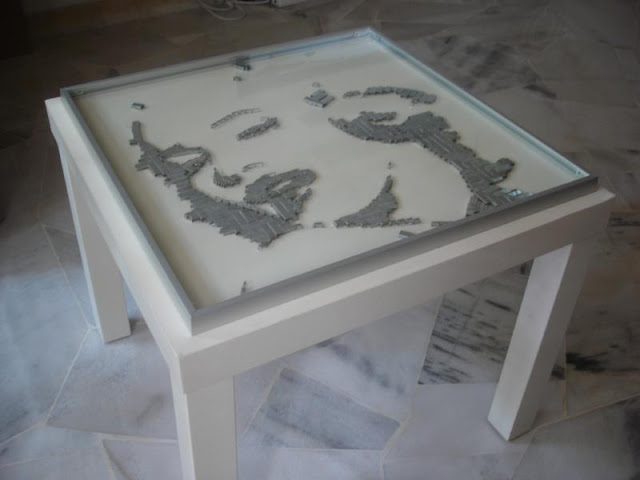
Description: IKEA LACK table is fantastic for add-on design due to it's original plain design, I chose my favorite photo from "Marilyn Monroe" to be this stapler art.
1) Using pencil to hand-sketch the layout of the stapler art object on the LACK table.
2) Put on the glue together with staplers, slowly paste on the hand-sketched object. It could be freely placed those staplers horizontally or vertically, until the whole layout appears.
3) Use eraser to erase those extra hand-sketched pencil line on the LACK Table after finished placing all the staplers.
4) Using Ikea STROMBY frame to cover up the entire stables art with extra protection.
~ Andy Low
LACK Side Table Planter
Materials: Ikea LACK side table
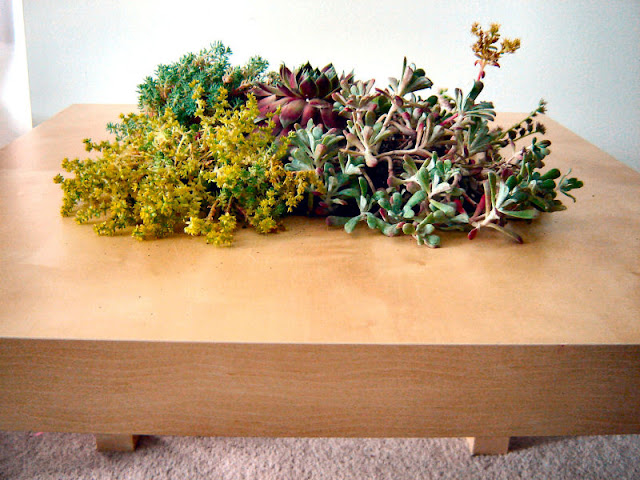
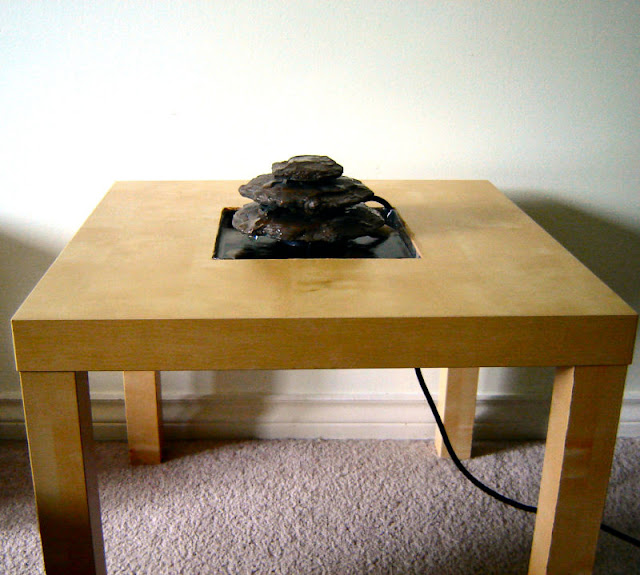
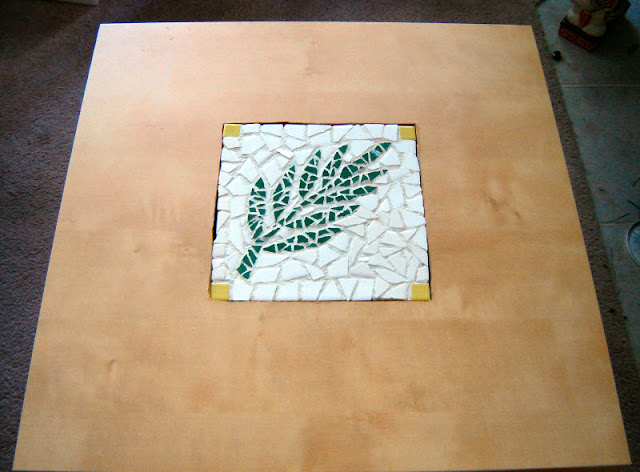
Description: This started out as an idea to turn an Ikea LACK Side table into a planter. But once I cut a hole in my LACK I realized there are a whole bunch of other things I could do with it. The best thing is that if you get bored with the way it looks you can change it up to match your mood or the seasons.
I basically cut a depressed cavity into the top of the LACK side table with saw. This was posted originally on Instructables, you can find detailed instructions there.
See more of the Lack side table planter.
~ Chrysn
Custom built-In IKEA PAX
Materials: PAX wardrobes
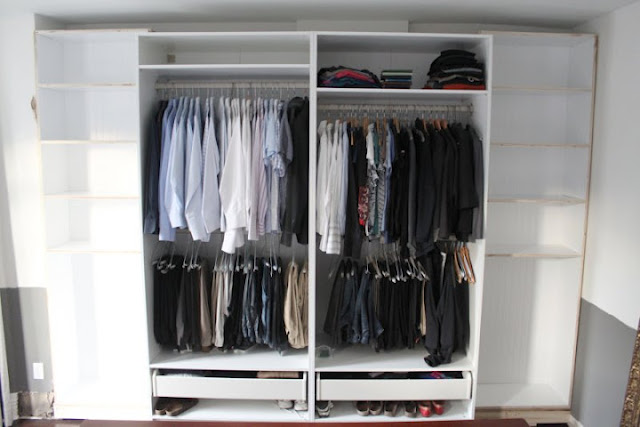
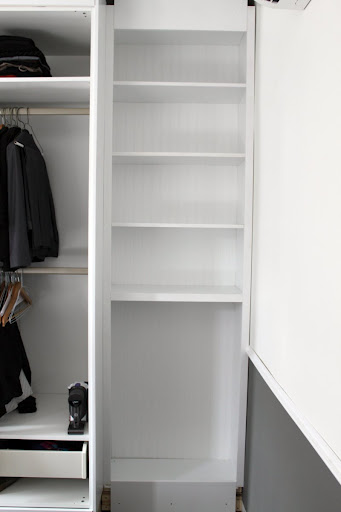
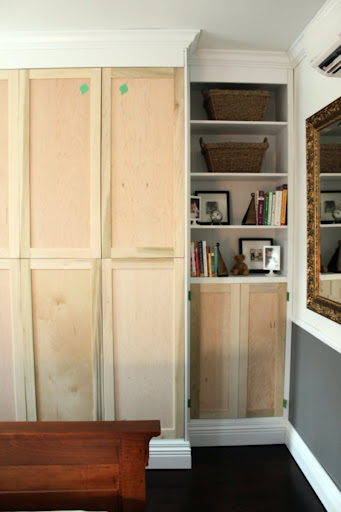
Description: I love how functional and flexible the IKEA PAX units are, but I don't like the look of having a big wardrobe sitting in my bedroom. I do however love the look of custom built-ins, so using the PAX as the foundation pieces, I built two shallower cabinets which I attached to either side, then I trimmed the whole thing out, with gables, friezes, toe kicks and wrapped it in baseboard and crown moulding to make it match the original mill work in the house.
I had a carpenter make new doors for both the PAX and the cabinets I built. Finally I painted it all out and added the IKEA Lansa handles.
See more of the custom built-in Pax wardrobe.
~ Roncy Vic, Toronto
Glowing Flower
Materials: IKEA Regolit Lamp, small and big paper muffin liners,a pair of scissors, glue
Description: I was a little bit bored by our Regolit Lamp, so I changed it a little bit.
First you have to cut the sides until the bottom of the Paper Muffin Liners.
After this you have to turn the paper muffin liners inside out and glue some of the smaller paper muffin liners into the bigger one.
Then you just have to glue the paper muffin liners on the REGOLIT lamp - DONE :)
I love it and it reminds me on a dandelion seed head...
See more of the glowing flower lamp.
~ Ahnungslose Wissende, Germany
Lack entry way table
Materials: Lack Shelves
Description: Husband and I wanted a modern looking entry way table but were unable to find anything we both liked. So we decided to Hack a LACK!
You will need:
Drill
Pencil
Level
8 L-Brackets with screws
4 LACK Shelves Length: 74 3/4 "
This is a pretty straight forward hack. We positioned shelves 7 inches from both top and bottom. Used L-Brackets to secure. You may use additional brackets to secure hack to wall. We have wood floors and it is pretty sturdy.
So far so good!
~ Mari and Hastings Huggins, Orlando, FL
Sunday, 26 February 2012
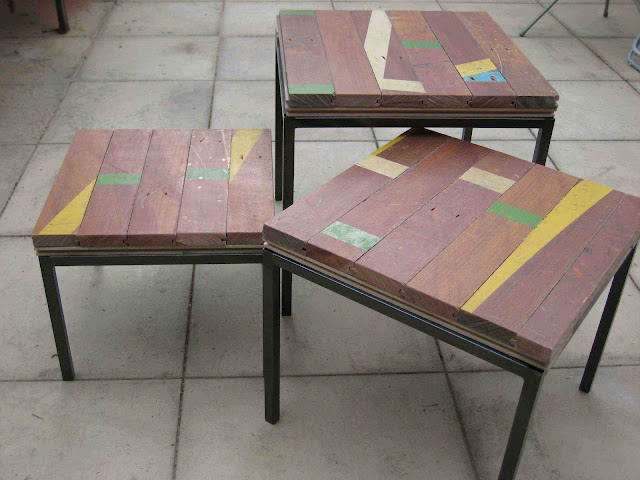
3-Pointer! Recycled timber vs basketball vs Ikea Klubbo
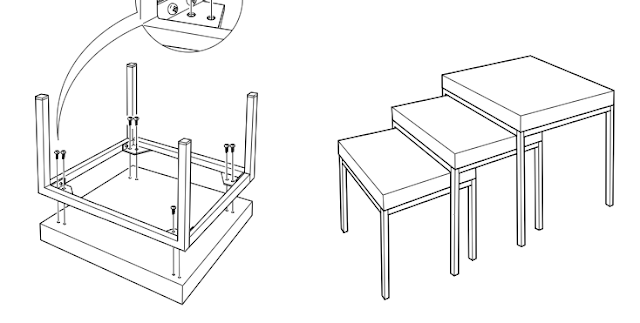
Materials: Klubbo (Nest of 3) Tables
Description: We'd bought an Ikea set of tables a few years ago. They served us well, even surviving our first daughter and her drawing / painting / play-doh / doll mash-ups. Over time the veneer cracked, and edging started to peel away. The tables' futures were sealed...
We needed new tables but i'd also been reading a lot about recycled timbers, particularly local Australian native hardwoods. These woods have beautiful colours, are very high quality and unique. Moreover, if you can locate a specialist native timber recycling yard, you are doing your bit to repurpose rather than always 'buy new'.
The metal Klubbo frame was still in good condition, so I simply wanted to remove the tops, and replace with great quality timber, that could I cut to size.
The great folk at the urban salvage yard, helped me select some colourful Blackwood timber, previously used as Basketball court floorboards. Best part, was it retained all of the line markings, and when put together with careful selection, allowed great patterns - Unique, quality design to be proud of. The timber cost a bit, but I was able to saw to size, and configure to the right height & shape (different for each of the three tables), to still nest together.
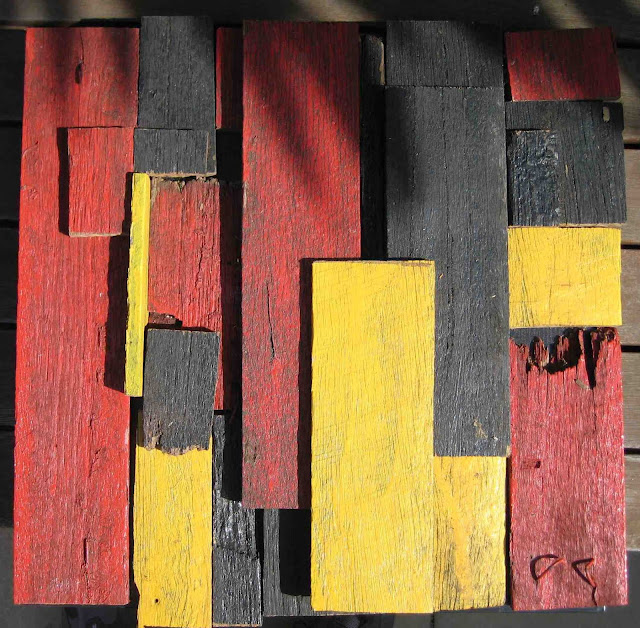
(Oh, and the old table top(s), became the base for a 2nd artwork, using old fence timber.
Happy with the outcome.
~ Jonno Cartwright
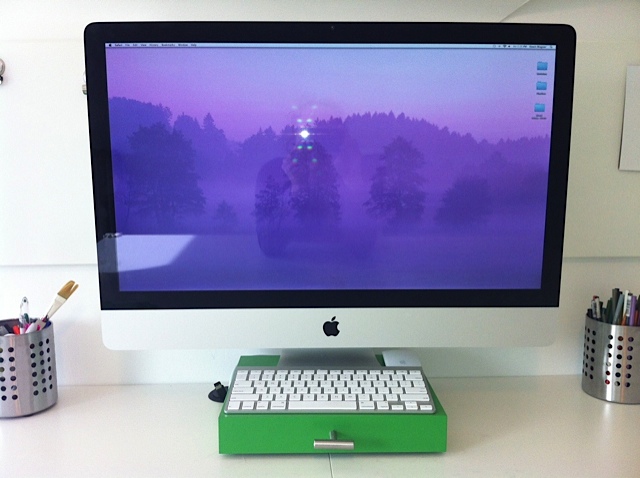
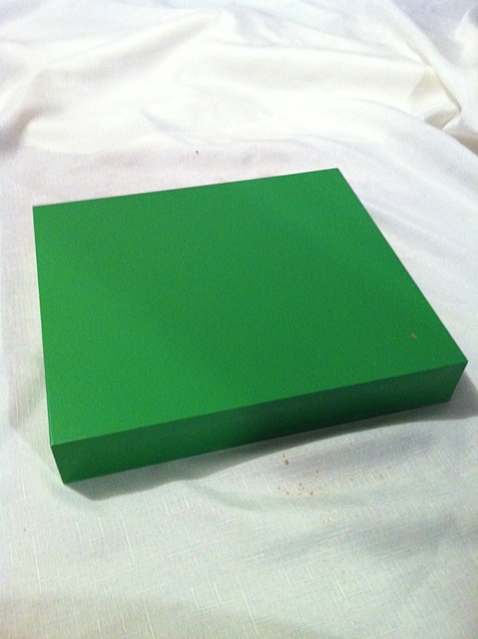
Lack Shelf to rolling iMac Stand
Materials: One Lack Shelf, Four small casters, Approx. 24 inches of 1x3, One drawer pull & Liquid Nails
Description: My husband and I sit face to face at a double sided workstation. We both use the same desktop iMac and needed a way to share it, without having to trade sides of the desk, or drag it across the table. We wanted a wall mounted arm, but when I saw the price I nearly dropped dead ($350!!!) This was my solution using the LACK shelf.
STEP ONE:
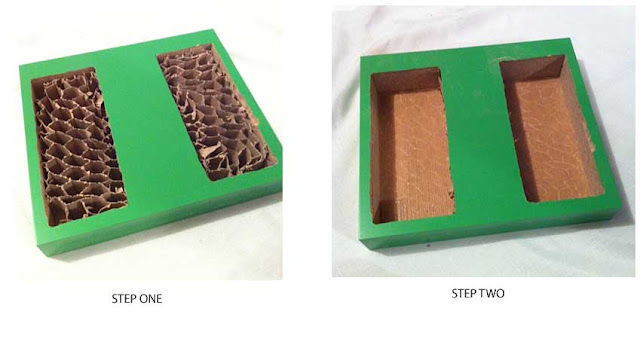
Drill pilot holes on the bottom of the LACK shelf and use a Dremmel or jig saw to cut out two rectangles. (There is a rather thick frame, so you have to measure in from the edges about an inch)
I suppose you could remove the entire bottom, but I wanted to maintain some strength in the middle.
STEP TWO:
Remove the pieces you cut out (The laminate can be popped off with a screwdriver) and then remove all of the 'honey comb' cardboard from the inside. A putty knife worked well for this.
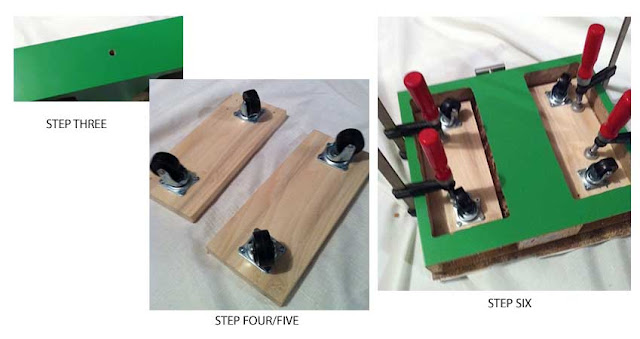
STEP THREE:
Drill a hole on the front edge of the shelf and insert your drawer pull. Inserting the screw might require tiny fingers.
STEP FOUR:
Cut your piece of 1x3 lumber into two pieces that will fit in the rectangles that you just cut out of the LACK.
STEP FIVE:
Pre-drill holes and attach the wheels to the 1x3. Make sure you place them in such a manner that they can fully rotate without hitting the edges of the LACK frame. Make sure your screws do not go through the other side.
STEP SIX:
Coat the interior of your shelf, and the back side of your 1x3's with Liquid Nails. Place them into the LACK shelf and clamp for a few hours.
STEP SEVEN:
Remove clamps, turn shelf over. Place computer on top. Voila!
WARNING!!!! It is VERY VERY easy to drill or cut through the other side. The laminate is very thin.
~ Dawn
Subscribe to:
Comments (Atom)


