- DIY cat shelves from Bjarnum shelves
- A cat tree from Expedit shelves
- A kitty litter from a Corras bedside table
- A hallway cat litter & food hideaway
- A Birkeland cat litter
~ Hiding a litter box in the hallway
Meow!
~ Jules
DIY Cat Shelves

Materials: Ekby Jarpen shelves and Ekby Bjarnum brackets, Flor carpeting and glue
Description: We were pretty much either unimpressed with a lot of the cat trees out there or AMAZED at the cost of the ones we were impressed with. So we decided to make our own. Here are the steps:
1. Mapped out a practical layout deciding which shelves would be loungers and which would just be steps.
2. Cut the Ekby shelves to size.

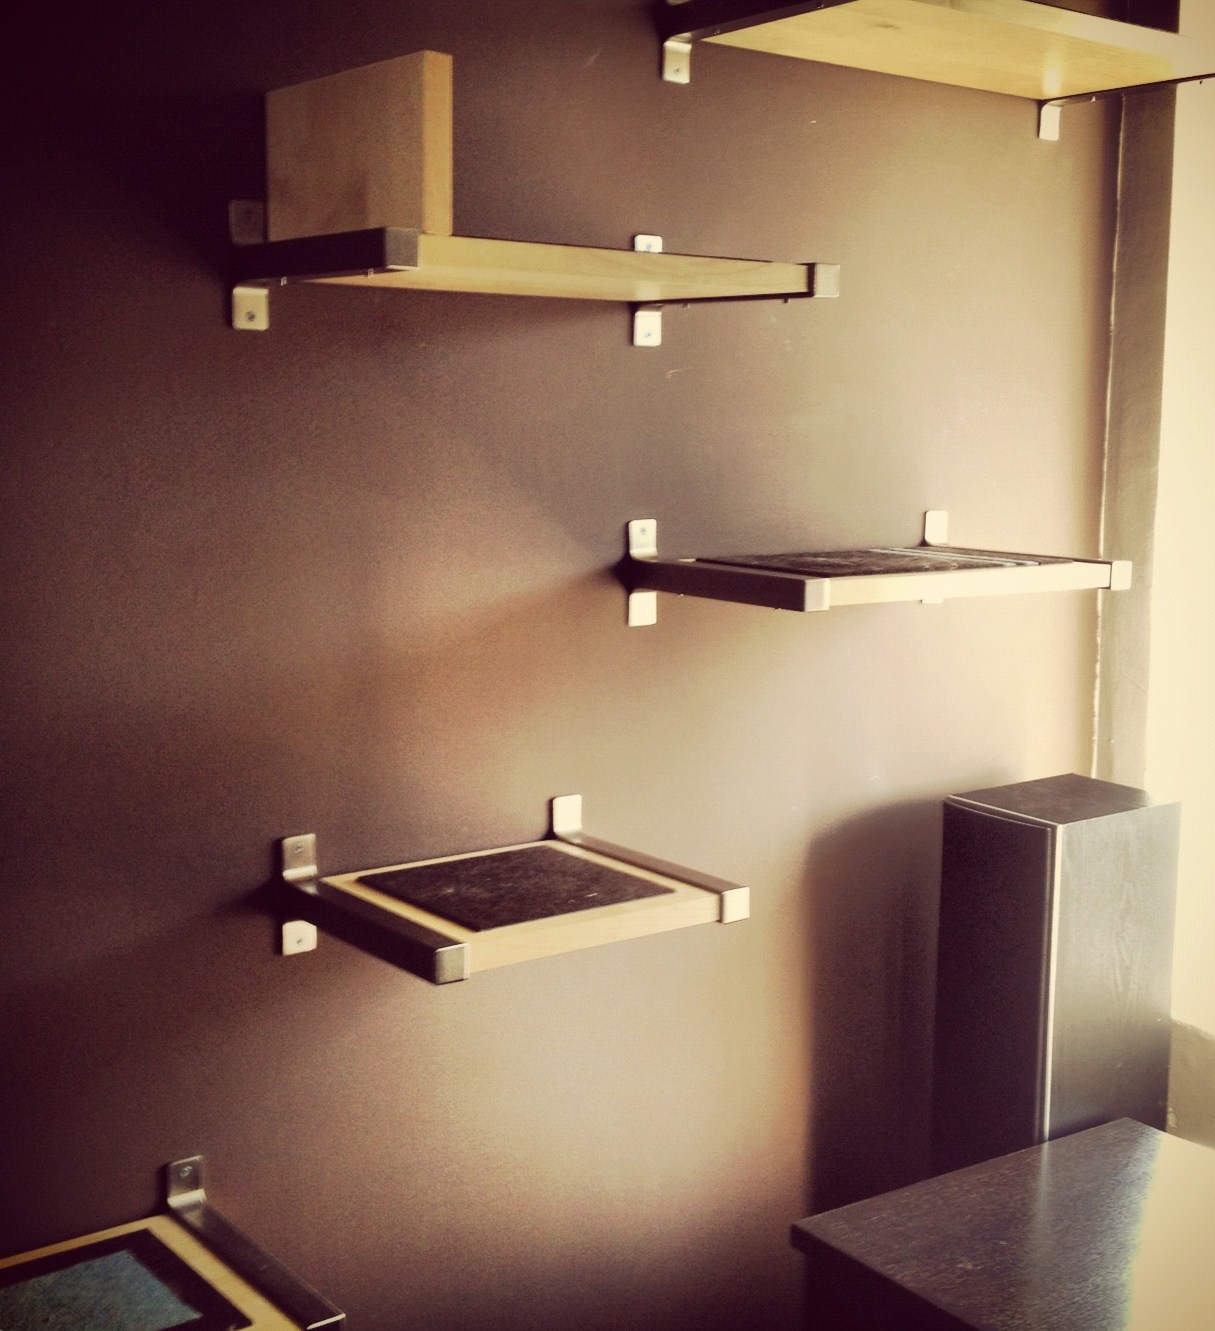
3. Cut Flor carpeting to size and glue to shelves.
4. Attach shelves to the wall.
Easy peasy. And our cats LOVE IT!

See more of the Cat shelves.
~ Lizzie, Santa Monica, CA
Expedit cat tree

Materials: Expedit shelves , L-brackets, area rug, padding, staple gun, screws, wall anchors , and power drill
Description: We had hacked a 4x4 Expedit bookcase to make an entertainment center. With the left over parts I made a kitty tree to replace a store bought one that took up too much floor space.
I used a long cross shelf and 3 small divider shelves. I pre-drilled holes in the long back and attached the smaller platforms with two screws a piece. I staggered two of the platforms so my kitty could easily jump to the top.
On the top again using a pilot hole I screwed a platform that was square with the edge of the back. I added L-brackets for support
I wanted my kitty to not just be laying on a hard surface covered with carpet so I bought some foam padding used in packing plates and stapled it to the platforms. I then covered the padded platforms with carpet cut from two 2'x4' cheap area rugs. I had enough carpet left to make a vertical scratching area on the floor level.
I then hung it on the wall with drywall anchoring screws. I didn't have to pre-drill any holes because there was holes left from the wooden pegs.
I covered the screws with small pieces of electrical tape because the screws were silver colored.
~ Kristyn, Pennsylvania
KITTY LITTER FROM BEDSIDE TABLE

Materials: Ikea "Corras" side table
Description: Over the weekend, I picked up an awesome Craigslist find - a discontinued Ikea side table slash soon-to-be incognito kitty litter.
The entire construction time came in just under 30 minutes and cost less than $20. This is how I made it.
SUPPLIES:
-Ikea Corras� side table ($15 from Craigslist)
-2 hinges
-8 screws (for hinges)
Drill
I removed the four casters by removing the screws fastening the casters to the underside of the table. Then I made the shelf into a door by attaching two hinges to the front of the table.

Since the shelf came with the table, it was a perfect fit- no need to trim or resize. I didn't mind the visible hinges, but you could buy hidden cabinet hinges from the hardware store.
Then I placed the litter box inside as so:

The cat accesses the litter box from the back of the side table, which rests a about eighteen inches from the wall. To clean the litter box, I can access it from the front by opening the newly installed door. So far the kitty seems to like his new digs!
See more of the kitty litter.
~ Fran Laks, Brooklyn, NY
Cat Litter & Food hideaway

Materials: 2 Faktum fan cabinet, 2 Applad doors
Description: I wanted to hide the cat litter positioned in the corridor, and I thought that it would have been great to find a way to make also the cat's food bowl inaccessible to our greedy Jack Russell Terrier!
I dug into the Ikea website looking for a cabinet that could fit the place where the litter initially was and found the Faktum kitchen fan cabinet: I bought 2, in order to use them vertically one on the other.
We mounted the cabinets and first thing, with the help of a friend and the right tool, we cut out the entrance on the side, cat head shaped. Then we cut the inner passage between the two cabinets.
We mounted the 2 Applad doors; then we applied 2 layers of felt pads under the cabinet that stays on the ground so that the door could open without scratching the floor; lastly we put some double-sided tape between the two cabinets, so that they could be stable together.


I'm planning to add a shelf inside the upper cabinet to store food and bowls.
~ Laura, Italy
BIRKELAND for Cats

Materials: Birkeland nightstand, hammer, wide chisel (or something with a blunt edge), glue
Description: Inspired by other Ikea hacks I've seen for hiding litter boxes I decided to make my own. I chose the Birkeland nightstand because the inside was the exact size of my cats litter box, and the height was perfect for beside the daybed in my spare bedroom/den. I started by building the nightstand as instructed. The hack comes when you get to the door. Lay the door on the floor, backside up. With a blunt edge chisel bang apart the frame of the door, removing each side one by one.


Be careful not to break the dowels that interlock the frame together. Once the frame is apart just take away the middle panel and put the frame back together. Use a little bit of glue in the dowel holes to ensure it's strong enough without that middle panel. For added privacy attach a sheer piece of fabric to the inside of the door (I just taped it). Now just hang the door as instructed and voila! A super simple nightstand/litter box home.
~ Nicole R, toronto, canada
Hiding a litter box in the hallway

Materials: Besta, TOFTA doors, cat flap
Description: Since I had my cat's litter box in the living room, right in front of the entrance, and there is no other place to put it, since the cat sleeps in there, I decided I had to find a way to hide it.
The perfect cabinet fitting the rest of the furniture (and containing the litter box) was Besta.


The hack consisted in making two holes: a hole in one side of the cabinet, to install a cat flap (bought in a pet shop), and another in the back for a ventilation grate.
Then we put the litter box in one half of the cabinet, while the other half is used to store cat food, brushes, and the like.
Ginger did not mind at all the change, and now if you don't notice the small window in one side, you really cannot tell the litter box is there.
~ Vale, Roma


